Dal brutto
anatroccolo al cigno
Tecniche di
ripresa ed elaborazione planetaria
|
Cratere Walter prima e dopo l’elaborazione (foto dell’autore) |

Vi piace il titolo ?
Mi sembra appropriato visto l’argomento di cui intendo parlare !
Prima di partire ed addentrarci nel
discorso voglio ricordare “3 comandamenti” essenziali per qualsiasi astroimager
(moderna definizione dell’astrofotografo):
![]() Meticolosa e maniacale collimazione delle ottiche
Meticolosa e maniacale collimazione delle ottiche
![]() Scrupolosa messa a
fuoco dell’immagine (da ripetere spesso durante la sessione fotografica)
Scrupolosa messa a
fuoco dell’immagine (da ripetere spesso durante la sessione fotografica)
![]() Seeing almeno 6/10 scala pickering…
altrimenti è meglio tornare a letto !
Seeing almeno 6/10 scala pickering…
altrimenti è meglio tornare a letto !
Partendo dal presupposto che non esiste
attualmente una specie di panacea o di formula
alchimistica in grado di trasformare un frame
qualsiasi in una immagine finale stupenda mi sono convinto che la via giusta
vada percorsa utilizzando alcuni procedimenti standard ma adattabili al modello
che dobbiamo trattare al momento. Quelle che seguono sono delle note e
documenti presi in giro ed adattati per cercare di aiutare chi vuole
intraprendere questa difficile ma affascinante “arte” della elaborazione
digitale di immagini astronomiche.
Iniziamo da IRIS, uno dei più potenti software free
in ambito astronomico.
Seguirà il tutorial
di Registax
ver.3
altro valido antagonista e forse un pò più
intuitivo soprattutto per chi è alle prime armi in ambito elaborativo.
![]() L’ACQUISIZIONE DI FILMATI PLANETARI
L’ACQUISIZIONE DI FILMATI PLANETARI
Apriamo IRIS e dopo aver applicato la Webcam clicchiamo sulla voce di
menu : WEBCAM > Preview.
L’operazione consente di visualizzare al monitor l’oggetto inquadrato, poniamo
Giove ad esempio.
Giove è un astro molto brillante per cui non potremo
riprenderlo in situazione automatica cosa fattibile per la Luna e talvolta per
Saturno, dovremo agire in situazione ‘manuale’.
Clicchiamo ora sulla voce di menu: Webcam > Video properties,
comparirà la finestra delle proprietà della webcam.
Assumiamo di operare con la Vesta.
All’apertura delle proprietà ci si presenterà la tabella relativa
ai controlli dell’immagine.
Lasciamo la LUMINOSITA’ al valore corrente di default settato dalla casa produttrice (circa il 60%).
Dobbiamo decidere ora il settaggio fps (frames per second) ovvero il numero dei frames
con cui vogliamo riprendere il pianeta.
Questo numero deve essere sempre <= 15, un valore più alto genererebbe un
rumore elettronico sensibile che si ripercuoterebbe sul frame
rendendolo inutilizzabile, oltre a creare problemi ulteriori
qualora il nostro computer non fosse dell’ultima generazione.
Se, e soltanto se il seeing
è alto, ovvero supera il valore di 5-6/10 sulla scala Pickering,
possiamo porre fps a 15, la qualcosa ci consente di
acquisire un alto numero di frames.
Se invece il seeing è di valore più basso, è buona
regola operare a 10 fps ed in casi di bassa
trasparenza atmosferica a 5 fps in modo da bilanciare
la diminuita luminosità dell’astro a causa di un’ eventuale
alta umidità atmosferica.
Il tempo di acquisizione dovrà porsi al MASSIMO sui
120 secondi, seppur in questo caso inizi ad evidenziarsi il moto angolare del
pianeta; meglio dunque porre 90 se non 60 secondi, un tempo comunque
sufficiente per registrare un alto numero di frames.
Un alto numero di frames registrato non è
indispensabile anche se auspicabile per la futura elaborazione degli stessi.
Tuttavia, il numero dei frames ritenuti buoni non
deve scendere sotto i 300-350 pena un insufficiente
possibilità di elaborazione degli stessi per la bassa dinamicità dell’
immagine che potrà risultare.
Settiamo infine il GAMMA ad un valore intorno al
10-20% onde evitare una ulteriore desaturazione dei frames con conseguente perdita della colorazione.
La prima tabella delle proprietà è così completamente settata.
La seconda prevede il settaggio della proprietà più
importante nella ripresa dei pianeti, quello che è chiamata GAIN, guadagno che
deve essere settato in modo appropriato quando si
agisce in modalità MANUALE.
Fortunatamente IRIS ci aiuta in questa fase critica mettendoci a disposizione
un importante ausilio: la misura del cosiddetto ADU (Analog
Digital Units) un sistema
di misura per calibrare l’intensità luminosa dell’immagine acquisibile.
Per far ciò è sufficiente cliccare, sempre in preview, menu
Webcam > One shot.
Si aprirà una box che presenterà una serie di numeri.
Sono i valori minimo e massimo per i canali R G B relativi
all’immagine che si sta riprendendo.
Tali valori dovranno essere rispettivamente 0 (zero) e circa 180 (un valore ottimale per Giove da come ho praticamente
riscontrato).
Un valore più alto di 180, a meno che il seeing non
sia elevato, o peggio minore di 20 punti, portano fatalmente ad una difficoltà
di elaborazione dei frames.
Una volta che avremo eseguito questo settaggio, blocchiamo il BILANCIAMENTO del BIANCO settando
l’ opzione automatico.
Siamo pronti così a riprendere il Gigante.
Per SATURNO il settaggio non è molto diverso da
quello di Giove e sostanzialmente valgono tutti i parametri suesposti.
Solo il GAMMA dovrà essere leggermente variato preferendo un valore prossimo a
zero, ma non zero.
La luminosità più bassa impone un valore del gamma più basso pena
l’introduzione dell’ onnipresente rumore elettronico
che si farebbe fastidioso con valori maggiori.
Per la Luna, se riprendiamo senza accessori interposti e nelle zone quasi
uniformemente illuminate, possiamo riprendere in modalità
completamente automatica, liberandoci così da settagli particolarmente
delicati.
Non così se operiamo con l’interposizione di accessori,
in questo caso valgono le stesse modalità operative per i pianeti.
![]() L’ELABORAZIONE DELLE IMMAGINI PLANETARIE
L’ELABORAZIONE DELLE IMMAGINI PLANETARIE
Dopo aver acquisito un filmato .avi di un oggetto
planetario, si rende necessario elaborare convenientemente i frames registrati.
L’ immagine contenuta nel frame generalmente non ha
una qualità tale da essere visualmente accettabile
“così come è” per molti motivi.
E’ necessario sommare una serie di frames per
aumentare la qualità, la nitidezza e la ricchezza di particolari che potrà
contenere l’immagine finale.
Il processo non è cosa molto semplice anche quando abbiamo registrato frames di buona qualità.
Ed ogni serie di filmati ripresi in una singola
sessione può doversi elaborare in modi particolari.
Sostanzialmente non esiste una modalità univoca nella elaborazione
e questo accade in particolar modo per le immagini di Giove.
Iniziamo a descrivere la elaborazione dei frames su
questo pianeta.
La prima cosa. è scegliere i frames
migliori tra quelli registrati.
Possiamo farlo in due modi sostanziali: visualmente
ossia manualmente, oppure affidare la scelta al programma di elaborazione.
Nel secondo caso la fase non è del tutto affidabile. Spesso, se non sempre, vengono lasciati frames
visibilmente non buoni, ovvero non contenenti dettagli apprezzabili, o peggio
vengono considerati frames che non li contengono
affatto.
E’ dunque meglio procedere ad una scelta manuale servendoci di VirtualDub oppure di affidare la scelta automatica a K3CCD Tools.
In quest’ ultimo
caso avremo anche la comodità di eseguire un primo allineamento delle immagine
contenute nei frames e un ridimensionamento della
grandezza del quadro di ripresa originale portandolo ad una misura utile ad una
successiva archiviazione più leggera.
Un filmato .avi di 60 secondi contiene qualcosa come
circa 500 megabytes che anche zippato si riduce
variabilmente a circa 60-100 megabytes.
L’ operazione della scelta così eseguita può essere completata con una scelta
manuale dei frames trattati.
A questo punto abbiamo la serie pronta al trattamento vero e proprio,
Questa fase può essere eseguita sia con IRIS che con REGISTAX.
Con il primo programma dovremo ancora attendere ad una serie di fasi di
elaborazione in quanto dovranno essere processati i canali RGB componenti l’
immagine totale.
Registax, quelle stesse fasi le compie unicamente per
poi passare a quella successiva che comprende quella della WAVELET, cioè l’ applicazione di un filtro atto a far risaltare i
particolari contenuti nell’ immagine grezza (rough o raw ) risultante.
![]() Vediamo la procedura con IRIS.
Vediamo la procedura con IRIS.
La prima cosa da farsi è settare la working path, ossia la directory dove il software appoggerà i file
elaborati. e dove verrà preventivamente posto il file
.avi da trattare.
Ora dobbiamo convertire il file nelle tre componenti R
G B (Red-Green-Blue) eseguibile automaticamente dalla
voce di menu File > AVI conversion..
Si presenterà una box dove scrivere il nome generico per i tre canali che
nomineremo semplicemente R G B.
L’ operazione immediatamente successiva è NORMALIZZARE ogni frames
dei canali a zero, in pratica portare a zero il sottofondo dell’ immagine.
La fase viene eseguita per ogni serie R G B da menu
PROCESSING > Offset normalization of a sequence
Nella box dovrà essere scritto il nome del file origine (input), del file
generato (output) e della quantità di frames da
trattare. Assumeremo di volta in volta R, G, B sia per l’ input
che per l’ output, risparmiandoci così un notevole spazio nell’ HDD.
Ora dobbiamo sommare ciascuna serie di files
ottenuti, possiamo continuare in tre modi, ma ne considererò due, i più veloci.
In ciascuno dobbiamo caricare un primo frames,
generalmente G1.
Da menu clicchiamo l’ iconcina
con “6 righine”, si presenterà una box dove potremo
scrivere i comandi necessari, ed in questo caso
LOAD G1.
L’ immagine dovrà essere inscritta in un rettangolo sufficientemente grande,
diciamo una volta e mezza la dimensione del pianeta.
Possiamo ora far eseguire il comando
COMPUTE_TRICHRO1 G R G B 256 [N° frames da trattare]
[N° frames totali]
Dove G R G B sono rispettivamente il frame di
confronto, R, G, B il nome generico dei frames di
canale. 256 la finestra su cui verranno allineati i frames di canale. Questo numero deve essere una potenza del
2 dunque, a seconda della grandezza dell’ immagine del
pianeta, potremo porre 64-128-256 o 512.
Più veloce è l’ altro comando
COMPUTE_TRICHRO2 G R G B 70 [N° frames da trattare]
[N° frames totali]
Dove G R G B hanno lo stesso significato del precedente; cambia il tipo di
finestra di allineamento, nel caso un numero che renda nettamente distinguibile
al programma il bordo del pianeta dal sottofondo.
Un buon valore di tale numero è appunto 70.
Al termine dell’esecuzione del comando avremo a disposizione quello che è il
risultato finale grezzo il rough-result o raw-result.
La successiva critica operazione è quella dell’ esaltazione
dei dettagli contenuti nel risultato, dobbiamo applicare in modo appropriato
una particolare serie di filtri.
Nella versione 4.13 di IRIS i file di canale del raw-result sono nominati
@R @G @B e la composizione dell’ immagine sarà eseguita per mezzo di una box
accessibile dal menu View > (L)RGB e dunque
dovremo scrivere nelle righe corrispondenti quei nomi.
Per facilitare le operazione successive salviamo l’
immagine ora generata scrivendo
SAVEBMP raw_result_0
E quindi ricarichiamola con
LOADBMP24 raw_result_0 R1 G1 B1
Carichiamo ora un canale alla volta e applichiamo il filtro di VAWELET con
valori opportuni, ad esempio
Finest = 2
Fine = 2
Medium = 1.5
Remain = 0.80
Applichiamo un GAUSS = 1.00
Salviamo di volta in volta il risultato SAVE R1….G1….B1
Ricarichiamo ciascun canale ed applichiamo gli stessi valori di wavelet ma con un valore REMAIN di 0.90 applicando in
ultimo sempre lo stesso GAUSS.
Ricarichiamo ancora i canali ed applichiamo un Unsharp
mask con check dell’
opzione edge e valori di default.
Infine ricomponiamo l’immagine con LOADBMP24 raw_result_0 R1 G1 B1.
Molto probabilmente i canali non saranno del tutto allineati, è ciò che faremo
in Registax dopo aver salvato il risultato finale
ottenuto in IRIS.
Passiamo dunque in Registax e carichiamo il risultato
come immagine .BMP.
Dopo il caricamento, Registax passa automaticamente
alla fase di Wavelet processing, in questa parte ci
viene presentata l’ opzione SET RGB SHIFT, usiamola.
Questa fase di caricamento dell’ immagine in Registax risulta conveniente per un aspetto importante; l’
immagine risultante in IRIS probabilmente sarà apparsa un po’ scura, il
passaggio ripristina la brillantezza a valori più alti..
Salviamo l’ immagine corretta anche con lo stesso nome con cui l’ abbiamo
caricata (ciascuno poi opererà come meglio crede) e ricarichiamola in IRIS per
i passaggi finali nel ritocco dei colori che si risolve nella maggior parte dei
casi ad un leggero aumento della loro saturazione spesso portandola ad 1.20.
Nel caso in cui il telescopio usato sia stato il C8 accoppiata alla Vesta, l’
aumento di saturazione potrà essere applicato con valori fino a 2.
Volendo dare un effetto patinato all’ immagine potremo variare il gamma in IRIS
raggiungibile da menu View > White
balance portandone il valore a 0.90-0.95.
L’ elaborazione in IRIS è certamente lunga, ma il risultato finale risulterà
molto soddisfacente.
L’ elaborazione in Registax prenderà molto meno
tempo, ma il risultato sarà leggermente inferiore, tuttavia l’
immagine finale potrà sempre essere corretta in IRIS.
La procedura in Registax si riduce al caricamento del
file .avi ed al calibramento
di alcuni parametri di elaborazione.
Stiamo attenti a lavorare in Color processing senza LRGB, in certi casi il risultato
può risultare sovraesposto e
difficilmente correggibile.
Dopo il caricamente ci verrà
chiesto di posizionare un rettangolo che deve circoscrivere l ‘immagine nel frames, usiamo quella più compatibile con le dimensioni del
pianeta registrato.
E’ assolutamente indispensabile scegliere un immagine
di confronto che sia la migliore possibile.
Dopo questa operazione il programma prosegue nella
sezione Aligning (Allineamento).
Qui dobbiamo settare alcuni parametri che possono risultare abbastanza critici.
Processing options : check l’ opzione con valore 50%
Optimizing options: Search
Area = 1 pixel
Il valore relativo alla Lower quality
istruisce il software nella scelta della quantità di frames
da sommare, in genere un buon valore è tra 75-80%.
Alignment filter= 5 pixels
Qualità filter band=10 allo start e = 5 per la width.
Check l’ opzione track object
Cliccare Align & stack.
Al termine della procedura il software passa alla sezione Wavelet
processing dove possiamo agire su 6 parametri al fine di esaltare i particolari
contenuti nel risultato.
I valori dipendono dalla quantità e la qualità dei frames
sommati.
Non possiamo dunque indicare alcun valore di massima.
Tuttavia, ciccando sui pulsanti relativi alle layers e mantenendoli premuti, possiamo avere un’ idea su
quei valori.
In via di principio è sempre meglio non eccedere, l’ immagine
finale potrà sempre essere rifinita in IRIS o in qualche software di fotoritocco.
![]() Tutorial: Registax
3
Tutorial: Registax
3
Nella seguente guida si propone
un'introduzione all’uso del software Registax ver.3 partendo dalla cattura di un video astronomico in
formato AVI.
Si tratta di una tutorial basilare dove si esploreranno le opzioni più comuni dell'applicazione.
- aprire il video AVI

Pressando il bottone "Select" nella barra degli attrezzi superiori si apre
un
quadro di dialogo per selezionare il video o immagini fisse che
andiamo a
processare. Può vedersi una previsualizzazione del contenuto dell'archivio alla
destra
del quadro e nella finestra principale
dell'applicazione.
Il programma può aprire
simultaneamente più di un video o immagine nei formati
sopportati: AVI, BMP, FIT, JPG, TIF e PNG. Questo permette di
processare sequenze di
immagini dello stesso oggetto ed ottenere migliori risultati. Per
selezioni
multiple, mantenere il tasto CTRL pressato e fare click sugli
archivi.
Accettando la
nostra selezione se il video o le immagini hanno informazione di colore e
l'opzione "Colour" della
barra di opzioni era disattivata, apparirà il seguente avviso:

Nel caso di volere conservare il
colore delle immagini, nei pianeti per esempio,
pressiamo "Yes". Se non abbiamo bisogno del colore, generalmente nella Luna,
pressiamo
"No". Ugualmente possiamo
cambiare l'opzione dalla sbarra superiore di
opzioni
del programma:

Attivando l'opzione
"Colour" si abilita l'opzione
"LRGB". Selezionando quest’ultima
avremo la possibilità di accedere a caratteristiche avanzate nel
procedimento
con wavelet (incrementare certe
caratteristiche dei colori specifici)
Attivando l'opzione
"Subdirectory" i risultati del procedimento si guarderanno
in una subdirectory della directory originale. Il nome
desiderato può
trovarsi nel quadro di testo una volta attivata l'opzione.
- selezionare il frame e l’area di riferimento

Facendo click nell'opzione "Framelist",
angolo inferiore destra, appare un elenco
con tutti i frames degli archivi
aperti. Questo elenco può percorrersi
utilizzando le frecce destra/sinistra della tastiera.
Bisogna scegliere un frame di riferimento, uno che sia
particolarmente buono, quello che
Mostra più dettagli e risulta più nitido. Questo frame
sarà utilizzato per il programma
per calcolare la qualità di tutti i frames.
Se si scelgono frames brutti, poco
nitidi, immagini torbide, si può fare
utilizzando la sbarra speciale della tastiera quando ci posizioniamo su
essa o
facendo click sull’icona di verifica alla sinistra di ogni frame ()
Si può fare una selezione manuale
dei migliori fotogrammi, o lasciare che il
programma calcoli automaticamente la qualità a partire dal frame di riferimento
selezionato.
Ora bisogna scegliere l'area nella
quale il programma farà l'inseguimento dell'oggetto.
Per questo selezioniamo un valore dalla opzione "Alignment
box" nella barra
di opzione:
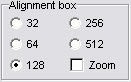
Il valore dipenderà dall’area della
struttura di riferimento. Se si tratta di
un pianeta, è possibile che sia completo in 64 o 128 pixel.
Piccoli
riferimenti, come getti possono usare aree più piccole. Quanto più grande è
l'area di inseguimento selezionata, più lento sarà il
processo.
Per l'esempio utilizzeremo un'area
di 128 pixel dove si trova il cratere
visibile verso il centro del video. Quando si posiziona
il cursore sull'immagine, l'area
appare squadrata. Si deve fare click nel centro del nostro oggetto
di
riferimento. Per
quanto possibile bisogna utilizzare una caratteristica ad alto contrasto e ben
definita per avere un buon inseguimento dell'area.
Attivando l'opzione
"Zoom" dentro "Alignment box", si
apre una piccola
finestra dove appare ampliata l'area dell'immagine dove si trova la
posizione del
mouse.
- allineato delle immagini

Quando si fa click sulla
caratteristica seguente si visualizzano vari
quadri
che possono evidenziarsi facendo click nell'angolo superiore
sinistra di ognuno,
In questa tappa si dovrà
selezionare un metodo di stima della qualità del
immagine, dalla barra di opzioni:

I metodi di stima di qualità sono
quattro: Classic, Human
Visuale, Compress
e Locale contrast. In questo esempio utilizzeremo il Classic,
lo stesso utilizzato in
versioni anteriori a questa. Si raccomanda leggere il riferimento
agli altri metodi in quello
manuale dell'applicazione e sperimentarne altri con essi.
In "Lowest
quality" deve dare la percentuale di immagini che saranno
processate una volta che si stimi la sua qualità.
Se versiamo il 70% la qualità delle immagini che saranno
processate devono stare sopra quel valore rispetto alla qualità dell'immagine
di riferimento originalmente selezionato. Quelle che stanno
sotto non saranno comprese nel processo.
Nell’opzione
"Tracking settings"
si raccomanda di lasciare selezionate le opzioni
"Track object"
e "Misalign warning",
questa ultima serve affinché il frame di riferimento
allineato
si perde il riferimento con l'opzione di tornare a selezionare
l'area e rifare il procedimento dall’inizio.

In questa versione del programma Registax calcola automaticamente la migliore
posizione
del FFT Filter. Così possiamo variare
la sua ubicazione per riuscire un FFT Spectrum
con
un centro rosso piccolo, dando maggiore importanza alle
caratteristiche più piccole dell'immagine dove, in teoria, si localizzano
i
dettaglia che gli concedono nitidezza.

Pressando il bottone "Align", sopra alla sinistra, comincia il processo di allineato
delle immagini. Si raccomanda di avere l'opzione
"Automatic" disattivato nella barra
di opzioni "Processing", ed un'area di 1024 pixel
selezionato.
![]()
Nella parte inferiore sinistra
della finestra si può seguire il progresso dell'allineamento delle
immagini. Una
volta completato, pressiamo il bottone "Limit",
ubicato giusto
sotto a "Align", Questo ci
permetterà di passare alla tappa successiva; questa opzione serve
per scartare tutti i frames che
stanno alla destra della barra di movimento
inferiore e bisogna assicurarsi che il controllo si localizzi alla
fine della barra di
movimento se vogliamo che si sia tenuto conto di tutti i frames.
- ottimizzazione

Una volta
terminato l’allineamento dei frames si passa allo schermo di ottimizzazione.
Nel grafico dove
appare la qualità dei frames ordinati da maggiore a
minore (linea rossa), e la differenza tra essi (linea
azzurra). Come è
logico, a minore
qualità la differenza si incrementa. L'ottimizzazione
ha come finalità ridurre
queste differenze.
In "Optimizer",
nella barra di opzioni, deve riversarsi l'area di
ricerca per
quell'ottimizzato e la
percentuale di ottimizzazione. Un'area piccola ed una percentuale
piccola darà risultati più precisi nel processo.

Click nel bottone "Optimize" per cominciare. Nella barra inferiore si
mostra il progredire dell’ottimizzazione. Per
scegliere la percentuale di ottimizzazione desiderata,
fino a quello
1% secondo quest’esempio,
può darsi che il processo si ripeta varie
volte automaticamente fino ad ottenerlo.
Una volta
terminato, passiamo allo schermo "Stack" facendo click sull'opzione di quello
stesso nome nella sbarra superiore.
- Stacking

Pressando sotto sull'opzione "Stackgraph"
alla destra, si apre il quadro di
selezione di frames. Coi
controlli di movimento orizzontale e verticale possono
selezionarsi i frames che si desiderano fare
la media per la riuscita dell'immagine finale.
L'asse orizzontale ha differenti frames ordinati per qualità, e nell'asse
verticale è possibile scartare i frames che
più differiscono da quello selezionato
originalmente.
La quantità di frames
selezionati per processare viene mostrata nella parte
inferiore
del programma (prendere nota di questo dato) per dopo poterlo
includere coi dati
dell'immagine finale, come la qualità e la differenza.
Nell'esempio, si hanno
selezionato 360 frames di una qualità maggiore
o uguale all’85% ed una differenza
minore o uguale al 70%:
Stacking: quality >=85 percento, difference <= 70 percento, n = 360
Opzionalmente, facendo click in "Stack
list" (sotto a destra), si può fare
un'ultima selezione manuale dei frames
che desideriamo che siano processati.
Questo elenco, a differenza di
quello del primo schermo, i frames sono ordinati per qualità, determinata automaticamente dal
programma.
Attivando l'opzione
"Expand image"
nella barra di opzioni superiore, il programma
darà l'immagine finale tenendo conto delle differenze tra
ogni frame.
Per cominciare il procedimento,
pressare il bottone "Stack", sopra alla
sinistra.
La barra di progresso nella parte
inferiore dello schermo ci informa della
percentuale
Dell sviluppo. Al termine, l'immagine processuata
sarà mostrata sullo schermo.
- Wavelets

Terminata la tappa di stacking si passa allo sviluppo con i wavelets
per risaltare le
caratteristiche dell'immagine. Per passare a questo schermo, fare click in
"Wavelet"
nella parte superiore dello schermo, alla destra dell'opzione
"Stack."
È buona norma conservare l'immagine
originale senza processarla, per potere fare
Un’altro tipo di sviluppo in un'altra occasione o con un altro software,
utilizzando un formato senza perdita di dati, come BMP, TIFF o FIT.
Lo sviluppo con wavelets
si divide in sei cappe (layers) che
intensificano
differenti caratteristiche dell'immagine. La prima cappa (layer 1) normalmente contiene
molti dei dettagli dell'immagine.
Muovendo i controlli appariranno i
risultati in tempo reale sull'area di
sviluppo. Questa area può muoversi,
facendo click sul l'immagine, nel caso
che l'area di procedimento selezionata sia minore dell'area
totale dell'immagine per processare
tutta l'immagine, pressare il bottone "Do all", questo bottone si trova
disattivato se l'area del processo abbraccia tutta l'immagine.
È importante essere diligente e non
sottoprocessare l'immagine. Un sotto processo
darà un aspetto artificiale e poco gradevole, con la
possibile apparizione di rumore.
Sotto alla destra
si localizzano le opzioni di "Contrast",
per ridurre la luminosità e
Il contrasto, e "Gamma",
per ridurre la gamma dell'immagine.
- ritocchi finali

Finito lo sviluppo con wavelets si passa alla parte finale del procedimento.
Per accedere
a questo schermo fare click in "Finale", nella parte superiore
dello
schermo, ed a destra di "Wavelet".
Su questo schermo di potrà ruotare
l'immagine selezionando "Flip X" e "Flip" e si può
fare una rotazione di 180 gradi e mettere, per esempio,
l'immagine della Luna con
il Nord verso l'alto.
Per le immagini a colore, può
ridurre accuratamente la saturazione muovendo
il controllo "Saturation”.
Per tagliare
un'area dell'immagine, trascinare il cursore dall'angolo superiore
sinistra fino all'inferiore destra col bottone sinistro pressato
incorniciando
l'area desiderata.
Può guardarsi una copia
dell'immagine in maggiori dimensioni con l'opzione
"Resize", e
selezionare nel quadro il livello di amplificazione, 200% per esempio.
Per conservare l'immagine finale,
pressare il bottone "Save Image".
Si raccomanda
di conservarla in un formato senza perdita di informazione,
BMP, TIFF o FIT.
Per la sua pubblicazione può ottimizzarla
con JPG e con qualche programma esterno, come
Photoshop,
opzione "Save for the web",
CTRL+SHIFT+ALT+S, e selezionare valori
di compressione ottimi per ogni immagine; si raccomanda non
meno del 51% di
qualità.
8. esempio finale
Di seguito si trova come esempio il
risultato di un processo di un'immagine lunare
utilizzando 360 frames selezionati
automaticamente. Si mostra una sezione del
immagine originale col cratere Posidonius
in primo piano.
Per questa immagine
si è utilizzato un telescopio riflettore newtoniano
di 114 mm f/8, barlow 2x, e camera Philips Vesta PCVC675K.
Frame individuale
originale

Immagine dopo lo stacking

Immagine processata con wavelets

Fonte Internet:
Enzo Di Bernardini - Astronomia Meridionale - http://astrosurf.com/ Tutti i diritti riservati © Astronomia
Meridionale -
astronomiasur@yahoo.com.ar
Traduzione dallo
spagnolo a cura di Giorgio Mengoli
English version
From the ugly duckling to the swan
Techniques of resumption and planetary elaboration
Crater Walter
before and after the elaboration (the author's photo)
Do you like
the title?
Seem me appropriate seen the matter of which intend to
speak!
Before departing and to penetrate us in the discourse
I want to remember "3 commandments" essential for any astroimagers (modern definition of the astrofotografo):
Meticulous and maniacal
coincidence of the opticses
Scrupulous mass to fire of the
image (to often repeat during the photographic session)
Seeing at least 6/10 climbs
Departing from the presupposition that a kind of
panacea or formula alchemic able doesn't currently exist to turn any frame into
a stupendous final image I have become convinced that the correct street is
goes crossed using some standard but adaptable procedures to the model that we
have to treat to the moment. Those that follow are of the notes and documents
taken around and adapted for trying to help who wants to undertake this difficult
but fascinating "art" of the digital elaboration of astronomic
images.
We begin from Iris, one of the most powerful softwares free in astronomic circle.
It will follow the tutorial of Registax
ver.3 other valid antagonist and perhaps a more intuitive pò
above all for the one that is to the first weapons in circle elaborativo.
THE ACQUISITION OF PLANETARY
TAPES
We open Iris and after having applied the Webcam clicchiamo on the voice of
menu: WEBCAM> Preview.
The operation allows to visualize
to the monitor the framed object, we for instance set Jupiter.
Jupiter is a star a lot of diamond for which we cannot
take back him/it in situation automatic feasible thing for the Moon and
sometimes for Saturn, we will have to act in situation 'manual.'
Clicchiamo now
on the voice of menu: Webcam> Video properties,
the window of the ownerships of the webcam will
appear.
We assume to operate with Dresses her/it.
To the opening of the ownerships the chart will
introduce him related to the controls of the image.
We leave the Brightness' to the current value of
default settato from the manufacturing house (around
60%).
We have to now decide the settaggio
fps (frames for second) or the number of the frameses
with which we want to take back the planet.
This number has to be always <= 15, a taller value
would produce a sensitive electronic noise that would strike again him on the
frame making him/it unusable, besides creating further problems if our computer
was not of the last generation.
If, and only if the seeing is tall, or it overcomes
the value of 5-6/10 on the staircase
If instead the seeing is of lower value, it is good
rule to operate to 10 fpses and in cases of low
atmospheric transparency to 5 fpses so that to
balance decreases her/it brightness of the star because of a' possible high
atmospheric damp.
The time of acquisition will owe I handed at the most
around 120 seconds, even though in this case you begin to underline him the
angular motion of the planet; better therefore to set 90 if not 60 seconds,
enough once however to record a tall number of frames.
A tall number of recorded frames is not essential even
if desirable for the future elaboration of the same.
Nevertheless, the number of the frameses
held good doesn't have to go down under the 300-350 punishment an insufficient
possibility of elaboration of the same for the low dynamism of the image that
can result.
Settiamo finally the
Range to a value around the 10-20% waves to avoid a further desaturazione
of the frameses with consequent loss of the
coloration.
The first chart of the ownerships is so entirely settata.
The second foresees the most important settaggio of the ownership in the resumption of the
planets, what has called GAIN, profit that has to be settato
in appropriate way when he acts in Manual formality.
Fortunately Iris helps us in this critical phase
making us an important aid available: the measure of the so-called ADU (Analog Digital Units) a system of measure to calibrate the
bright intensity of the acquirable image.
To do this is enough cliccare,
always in preview, menu
Webcam> One
shot.
It will open a playpen that will introduce a series of
numbers.
They are the values least and maximum for the channels
R G B related to the image that he is taking back.
Such values will have to respectively be 0 (zero) and
around 180 (an optimal value for Jupiter from as I have practically found).
A taller value of 180, unless the seeing is not
elevated, or worse smaller of 20 points, they fatally bring to a difficulty of
elaboration of the frameses.
Once that we will have performed this settaggio, we stop the Balancing of the White settando the option automatic.
We are ready so to take back the Giant.
For Saturn the settaggio is
not very different from that of Jupiter and substantially all the parameters suespostis are worth.
Only the Range must slightly be varies preferring a
next value to zero but not zero.
Lowest brightness imposes a value of the range lowest
punishment the introduction of the omnipresent electronic noise that would do
him annoying with greater values.
For the Moon, if we take back without mediate
accessories and in the zones almost uniformly illuminated, we can take back in
completely automatic formality, freeing us so that particularly delicate settagli.
Not so if we operate with the interposition of
accessories, in this case same operational formalities are worth for the
planets.
THE ELABORATION OF THE PLANETARY
IMAGES
After having acquired a tape. ancestors of a planetary object, make him necessary to
suitably elaborate the recorded frameses.
L' contained image in the frame doesn't generally have
such a quality to visually be acceptable "as it is" for many
motives.
And' necessary to add a series of frames to increase
the quality, the neatness and the wealth of details that you/he/she can contain
the final image.
The trial is not what very simple also when we have
recorded frames of good quality.
And every series of tapes taken back in a single
session can have to be elaborated in particular ways.
Substantially an univocal
formality doesn't exist in the elaboration and this happens in particolar way for the images of Jupiter.
We begin to describe the elaboration of the frameses on this planet.
The first thing. it is to choose the best frameses
among those recorded.
We can do him/it in two substantial ways: visually or rather
manually, or to submit the choice to the program of elaboration.
In the second case the phase is not reliable entirely.
Often, if not always, frames is left not visibly good,
or not containers appreciable details, or worse you/they are considered frames
that doesn't contain at all them.
And' therefore better proceeding to a choice manual
using us VirtualDub or to submit the automatic choice
to K3CCD Tools.
In quest' last case we will also have the convenience
to perform a first alignment of the image contained in the frameses
and a ridimensionamento of the greatness of the
picture of original resumption bringing him/it to an useful measure to a
following lighter filing.
A tape. ancestors of 60 seconds it contains something as around 500 megabyteses that also zippato
variably reduces him to around 60-100 megabyteses.
L' operation of the choice so performed you/he/she can
be completed with a choice manual of the treated frameses.
To this point we have the ready series to the real
treatment,
This phase can be performed both with Iris and with
REGISTAX.
With the first program we will still have to attend to
a series of phases of elaboration in how much the channels must be tries
component RGB the total image.
Registax, those same
phases it entirely completes her for then to pass to that following that
understands that of the WAVELET, that is the application of a fit filter to
make to jump the particular contents in the raw image (rough or raw)
resultant.
We see the procedure with Iris.
The first thing to make himself/herself/themselves is settare the working path or rather the directory where the
software will support the elaborate files. and where
place the file will preventively come. ancestors to be
treated.
We now have to convert the file in the three
components R G B (Red-Green-Blue) executable automatically from the voice of
menu File> Ancestors conversion..
You will introduce a playpen where to write the
generic name for the three channels that we will simply name R G B.
L' immediately following operation is to Normalize
every frames of the zero channels, in practice to bring the foundation of the
image to zero.
The phase is performed for every series R G B from
menu
PROCESSING> Offset normalization of to
sequence
In the playpen you/he/she must be writes the name of
the file origin (input), of the produced file (output) and of the quantity of
frames to be treated. We will assume of time in time R, G, B
both for the input and for the output, saving us so a notable space in the
HDD.
We now have to add every series of gotten files, we
can continue in three ways, but I will consider the fastest two of it.
In every we have to load a
first frames, generally G1.
From menu clicchiamo the iconcina with "6 rule of it", a playpen will
introduce where we can write the necessary commands, and in this case
LOAD G1.
L' image must sufficiently be subscribes in a great
rectangle, we say once and half the dimension of the planet.
We can now make to perform the command
COMPUTE_TRICHRO1 G R G B 256 [N° frames to be treated]
[N° total frames]
Where G R G Bs are respectively the
frame of comparison, R, G, B the generic name of the frameses
of channel. 256 the window on which the frameses
of channel will be lined up. This number has to be therefore a 2 power,
according to the greatness of the image of the planet,
we can set 64-128-256 or 512.
Faster it is the other command
COMPUTE_TRICHRO2 G R G B 70 [N° frames to be treated]
[N° total frames]
Where G R G Bs have the same meaning of the precedent;
it changes the type of window of alignment, in the case a number that clearly
makes distinguishable to the program the edge of the planet from the
foundation.
A good value of such number is note 70.
At the end of the execution of the command we will
have available what is the raw final result the rough-result or
raw-result.
The following criticism operation is that of the
exaltation of the contained details in the result, we have to apply in
appropriated way a particular series of filters.
In the version 4.13 of Iris the files of channel of
the raw-result are named
@ R @ G @ B and the composition of the image a playpen
will be performed accessible from through the menu View> (L)RGB and
therefore we will have to write in the corresponding lines that names.
To facilitate the operation following we save the
image now produced writing
SAVEBMP raw_result_0
And therefore let's reload her/it with
LOADBMP24 raw_result_0 R1 G1 B1
We now load one channel at a time and we apply the
filter of VAWELET with opportune values, for instance
Finest = 2
End = 2
Medium = 1.5
Remain = 0.80
We apply a GAUSS = 1.00
We save of time in time the result SAVE R1…. G1….
B1
We reload every channel and we apply the same values
of wavelet but with a value REMAIN of 0.90 always applying in last the same
GAUSS.
We still reload the channels and we apply an Unsharp mask with check of the
option edge and values of default.
We finally recompose the image with LOADBMP24
raw_result_0 R1 G1 B1.
Very probably the channels won't be entirely lined up, it is what we will do in Registax
after having saved the final result gotten in Iris.
We pass therefore in Registax
and we load the result as image. BMP.
After the loading, Registax
automatically passes processing to the phase of Wavelet, in this part
you/he/she is introduced us the option Set RGB SHIFT, let's use her/it.
This phase of loading of the image in Registax results convenient for an important aspect; the
resultant image in Iris some dark will probably have appeared, the passage
restores the values hulling taller..
We also save the correct image with the same name with
which the has loaded (then every will operate as he/she believes better) and
let's reload her/it in Iris for the final passages in the retouch of the colors that often resolves him in the most greater part of
the cases to a light increase of their glut bringing her/it to 1.20.
In the case in which the used telescope both is the C8
joined to Dresses her/it, the I increase of glut
you/he/she can be applied with values up to 2.
Wanting to give an effect varnished to the image we
can vary the range in attainable Iris from menu View> White balance bringing
the value of it to 0.90-0.95.
L' elaboration in Iris is certainly long, but the
final result will result very satisfactory.
L' elaboration in Registax
will take very less time, but the result will slightly be inferior,
nevertheless the final image can be always correct Iris.
The procedure in Registax
reduces him to the loading of the file. ancestors and
to the calibramento of some parameters of
elaboration.
We are careful to work in Color
processing without LRGB, in certain cases the result can result sovraesposto and hardly corrigible.
After the loadedly
you/he/she will be asked us to position a rectangle that has to circumscribe l
'image in the frames, uses that more compatible with the dimensions of the
recorded planet.
And' absolutely essential to choose an image of
comparison that I/you/he/she am the best possible.
After this operation the program continues in the
section Aligning (Alignment).
Here we owe settare some
parameters that can result enough critical.
Processing options: check the option with value
50%
Optimizing options: Search Area = 1 pixel
The value related to the Lower quality instructs the
software in the choice of the quantity of frames to add,
generally a good value is among 75-80%.
Alignment filter = 5 pixelses
Quality filter band=10 to the start and = 5 for the
width.
Check the option track object
Cliccare Align & stack.
At the end of the procedure the software passes
Wavelet to the section processing where we can act on 6 parameters with the
purpose to exalt the particular contents in the result.
The values depend on the quantity and the quality of
the added frameses.
We cannot point out therefore some value of
motto.
Nevertheless, ciccando on
the buttons related to the layerses and maintaining
presses them, we can have a' idea on that values.
In the street of principle it is better always not to
exceed, the final image can be always finished up in Iris or in some softwares of fotoritocco.
Tutorial: Registax
3
In the following guide an introduction proposes him to
the use of the software Registax ver.3 departing from
the capture of an astronomic video in formed Ancestors.
It deals with a fundamental tutorial where the options
will be explored most common of the application.
1. to open the video
Ancestors
Pressing the button "Select" in the bar of
the superior utensils it opens a
picture of dialogue to
select the video or fixed images that we go to
to try. You/he/she
can see him a previsualizzazione of the content of
the file to the right
of the picture and
in the principal window of the application.
The program can simultaneously open more than a video
or image in the formats
borne: ANCESTORS, BMP,
FIT, JPG, TIF AND PNG. This allows to try sequences
of
images of the same
object and to get best results. For selections
multiple, to maintain the
key pressed CTRL and to make click on the files.
Accepting our selection if the video or the images
have information of color and
the option
"Colour" some bar of options was disarmed, the following notice will
appear:
In the case to want to preserve the color of the images, in the planets for example,
we press
"Yes". If we don't need the color,
generally in the Moon, we press
"No". Equally we can change the option from
the superior bar of options
of the
program:
Activating the option "Colour" the option
trains him "LRGB". Selecting this last
we will have the
possibility to access advanced characteristics in the procedure
with wavelet (to
increase certain characteristics of the specific colors)
Activating the option "Subdirectory" the
results of the procedure will look him
in a subdirectory
of the original directory. The desired name is able
to be
himself/herself/themselves in the picture of text once activated the
option.
2. to select the frame and
the area of reference
Making click in the option "Framelist",
angle inferior right, a list appears
with all the frameses of the open files. This list can cross him
using the arrows destra/sinistra of the keyboard.
It needs to choose a frame of reference, one that is
particularly good, that that
It shows more details and it results clearer. This
frame will be used for the program
to calculate the
quality of all the frameses.
If ugly frameses are chosen,
few clear, images flood waters, can be made
using the special bar
of the keyboard when we position there on it or
making click on the
icon of verification to the left of every frame ()
A manual selection of the best frames can be made, or
to leave that the
it automatically
programs calculations the quality beginning from the frame of reference
selected.
It now needs to choose the area in which the program
will make the pursuit of the object.
For this we select a value from the option
"Alignment playpen" in the bar
of option:
The value will depend on the area of the structure of
reference. If it deals with
a planet, is
possible that I/you/he/she am complete in 64 or 128 pixels. Small
references, as
you throw you/they can use smaller areas. How much greater it is
the area of pursuit
selected, slower it will be the trial.
For the example we will use an area of 128 pixels
where the crater is found
visible toward the center of the video. When the cursor is positioned on the
image the area,
it appears square.
It is had to make click in the center of our object
of
reference. As far as
possible it needs to use a characteristic to tall contrast and well
defined for having a
good pursuit of the area.
Activating the option "Zoom" inside
"Alignment playpen", it opens a small
window where it appears
widened the area of the image where the position of the is found
mouse.
3. lined up of the
images
When he makes click on the following characteristic
various pictures they are visualized
what you/they can
underline him making click in the superior angle left of each,
In this it covers it will be had to select a method of
respect of the quality of the
image, from the bar of
options:
The methods of respect of quality are four: Classic,
Human Visuale, Compress
and Local contrast.
In this example we will use the Classic, the same used in
anterior versions to
this. You recommends to read the reference to the
other methods in that
manual of the
application and to experiment others of it with them.
In "Lowest quality" it has to give the
percentage of images that you/they will be
you try once that
its quality esteems him.
If we pour 70% the quality of the images that you/they
will be tried they have to be above that value in comparison to the quality of
the image of reference originally selected. Those that are
under they won't be
inclusive in the trial.
In the option "Tracking settings" it
recommends him to leave you select the options
"Track object" and "Misalign
warning", this last serves so that the frame of lined up reference
the reference loses
him with the option to return to select the area and to refer the procedure
from the beginning.
In this version of the program Registax
automatically calculates the best position
of the FFT Filter.
This way we can vary his/her location to succeed a FFT Spectrum with
a small red center, giving greater importance to the
smaller characteristics
of the image where, in theory, they locate him the
it details that
they grant him neatness.
Pressing the button "Align", above to the
left, the trial starts of lined up
of the images. You recommends to have the option "Automatic" disarmed
in the bar
of options
"Processing", and an area of 1024 selected pixels.
In the part inferior left of the window the progress
of the alignment of the can be followed
images. Once completed,
we press the button "Limit", situated correct
under to
"Align", This will allow us to pass to it covers her/it following;
this option serves
to discard all the frameses that are to the right of the bar of movement
inferior and it needs to
make sure himself/herself/themselves that control locates him at the end of the
bar of
movement if we want that
of all the frameses is kept in mind.
4. optimization
Once finished the alignment of the frameses
him it passes to the screen of optimization.
In the graph where the quality of the frameses appears ordered from greater to
smaller (red line), and
the difference among them (blue line). As it is logical, to smaller
quality difference is
increased. The optimization has as finality reduce
these
differences.
In "Optimizer", in the bar of options, it
has to flow himself/herself/themselves the area of search for
the optimized one
and the percentage of optimization. A small area and a percentage
small it will give
more precise results in the trial.
Click in the button "Optimize" to start. In
the inferior bar it appears the to progress some
optimization. to choose the percentage of desired
optimization up to that,
1% second this example, can give that the trial automatically
repeats him various times thin to get him/it.
Once finished, we pass to the screen "Stack"
making click on the option of that
same name in the
superior bar.
5. Stacking
Pressing under on the option "Stackgraph"
to the right, it opens the picture of
selection of frames. With
the controls of horizontal and vertical movement they are able
to select him the frameses that are desired to make the average for the
result of the final image.
The horizontal axle has different frames ordered for
quality, and in the axle
vertical it is possible
to discard the frameses that more they differ from
the selected one
originally.
The quantity of frames selected for trying is shown in
the inferior part
of the program (to
take note of this datum) for later to be able to include him/it with the
data
of the final image
as the quality and the difference. In the example, they are had
selected 85% greater or
equal quality 360 frameses and a difference
smaller or equal to
70%:
Stacking: quality >=85 percent, difference <= 70
percent, n = 360
Optionally, making click in "Stack list"
(under to the right), you/he/she can be done
a last manual
selection of the frameses that we desire that is tried.
This list unlike that of the first
screen, the frameses are orderly for quality,
automatically determined by the program.
Activating the option "Expand image" in the
superior bar of options, the program
it will give the
final image keeping in mind of the differences among every frame.
To start the procedure, to press the
button "Stack", above to the left.
The bar of progress in the inferior part of the screen
informs us about the percentage
Dell I develop. At the end, the image processuata will have shown on the screen.
6. Wavelets
Finished it covers her/it of stacking he passes to the
development with the waveletses to jump the
characteristics of
the image. to pass to this screen, to make click in
"Wavelet"
in the superior
part of the screen, to the right of the option "Stack."
Norm is good to preserve the original image without
trying her/it to be able to do,
Another type of development in another occasion or
with another software, using a format without loss of
data as BMP, TIFF or FIT.
The development with wavelets divides him in six
cloaks (layers) that they intensify
different characteristics
of the image. You first cloak (layer 1) it normally contains
many gods details of
the image.
Moving the controls they will appear the results in
real time on the area of
development. This
area can stir, making click on the the image, in the
case
what the area of
procedure selected both smaller of the total area of the image to try
the whole image, to
press the button "I Give all", this button is found
disarmed if the area of
the trial embraces the whole image.
It is important to be industrious and not sottoprocessare the image. An under trial
it will give an
artificial aspect and few pleasant with the possible apparition of noise.
Under to the right the options are located of
"Contrast", to reduce the brightness and
The contrast, and "Range", to
reduce the range of the image.
7. final retouches
Ended the development with wavelets he passes to the
final part of the procedure.
To access this screen to make click in
"Final", in the superior part of the
screen, and to the
right of "Wavelet."
On this screen of you/he/she can rotate the image selecting
"Flip X" and "Flip" and he is able
to make a rotation
of 180 degrees and to put, for example, the image of the Moon with
the North
upward.
For the images to color,
you/he/she can carefully reduce the glut moving
the control
"Saturation."
To cut an area of the image to drag the cursor from
the superior angle,
left up to the
inferior right with the pressed left button framing
the desired
area.
You/he/she can look at a copy of the image in greater
dimensions with the option "Resize", and
to select in the
picture the level of amplification, 200% for example.
To preserve the final image, to press
the button "Save Image". you recommends
to preserve her/it
in a format without loss of information, BMP, TIFF or FIT.
For his/her publication you/he/she can optimize her/it
with JPG and with some external program, as
Photoshop, option "Save for the web",
CTRL+SHIFT+ALT+S, and to select values
of compression
excellent for every image; recommend him not less than 51% of
quality.
8. final example
Following it is as example the result of a trial of a
lunar image
using 360 frameses automatically selected. It appears a section of
the
original image with the
crater Posidonius in the foreground.
For this image a telescope reflector newtoniano of 114 mms f/8 is used, barlow 2x and room Philips Dress PCVC675K.
Original individual Frame
Image after the
stacking
Image tried
with wavelets
Source
Internet: Enzo Of Bernardini
- Southern Astronomy - http://astrosurf.com / All the
reserved rights Southern © Astronomia -
astronomiasur@yahoo.com.ar