Assembly of the lower card: make sure that the connectors DB15 and DB25 go through
the housings on the back side easily. The power wires of the Peltier module and
the fan should not hang over the edge of the camera, push them gently inwards
with a small screwdriver (warning: the Peltier module is fragile!). Once the card
is positioned, mount the M3x10 screws that hold the connectors in place (two screws
for each connector). Hold the nut between the card and the back side while you
are tightening the screw.
 The lower card is held in place by the DB15 and DB25 connectors. Note that the fastening nuts are pressed against the connectors face (and not on the card).
 The lower card in place seen from overhead.
Assembly of the upper card: cover the upper side of the drain with a thin layer of heat grease.
 Using your finger, spread the heat grease on the side the CCD is leaning on. Clean your hands thoroughly after this step to avoid getting heat grease on the CCD: it's hard to get off!
Plug the upper card in the lower card connectors. Make sure that the cards are parallel and that the lower side of the CCD is in contact with the upper part of the thermic finger. A certain amount of play (about 1 mm) is required between the cards and
 The upper card once in place. Note the space (about 1 mm) between the two cards which is normal.
Screw the two M2.5x10 nylon screws, fastening the CCD to the thermal drain. Tighten the screws firmly but not too tight (the screws are relatively fragile!). Do not use metal screws that could cause the sensor ceramic to break during the rise or fall i
 The fastening screws of the CCD are in place. The camera is taking shape!
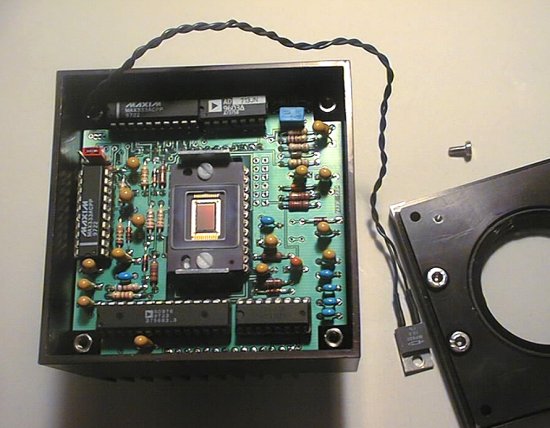
Assembly of the camera's central body: if need be, gently push the wires that are hanging out inwards using a screwdriver. If used, fasten the thermal resistance into one of the M3 holes on the front but beforehand apply a little heat grease onto the c
 The camera body is assembled. The T0-220 casing of the heating resistance is ready to be screwed on with a M3x5 screw.
 Tighten the resistance firmly onto the front (don't forget to put a little heat grease under the resistance before attaching it).


