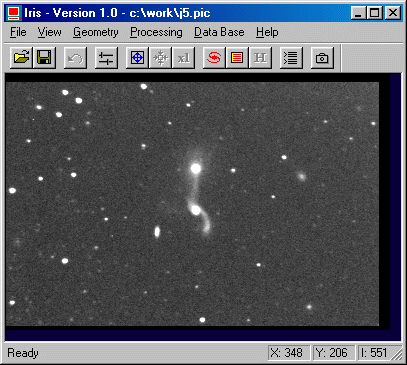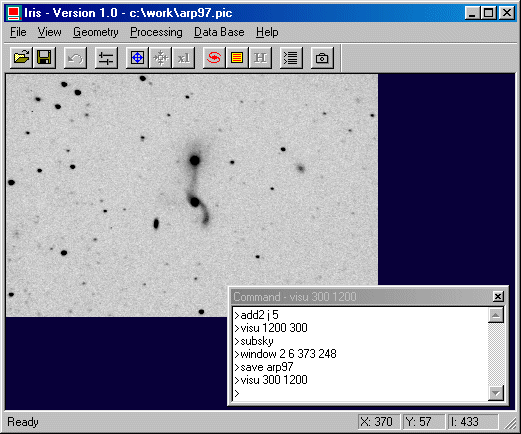
We have now to combine the pre-processed and registered images. Some, you may notice that the background level is relatively high in the images (because urban sky pollution, moon, and so on). We strongly suggested that you subtract a constant value to each image before adding them, in order to avoid numeric saturation points in the output image (maximum level of 32767 with 16-bit signed integers). You can use the OFFSET command with a negative constant for each image J1 to J6.PIC. However, there is a simpler function called NOFFSET2 (N means 'normalized'). Type:
NOFFSET2 J J 100 5
Then the background level will be automatically set to 100 for each of the 5 images. The meaning of the parameters is obvious.
So, the last thing to do is to add the images. The long method consists in typing:
LOAD J1
ADD J2
ADD J3
ADD J4
ADD J5
SAVE RESULT
But of course, Iris allows you to do that more quickly:
ADD2 J 5
Visualize the result with right thresholds (e.g. VISU 1200 300). That would not be too bad!

You may choose another method instead of adding the images, i.e. to perform a median averaging of the sequence. It will remove more efficiently cosmic rays and also other parasites in the image, but the detectivity (the limiting magnitude) of the result will not be quite as good as with the simple addition of the images. Just type:
SMEDIAN J 5
Warning: the median method works here because we have normalized the background levels and because the exposure times are the same for each image of the sequence. This the case here.
See also the useful COMPOSIT, ADD3 or DRIZZLE commands. For example:
COMPOSIT J 1.5 1 5
This last command stack the frames with a 1.5-sigma rejection (= reduction of the noise)
ADD3 J 2.0 5
This last one command select only frames with
FWHM<2.0.
8. CORRECTING BACKGROUND NON UNIFORMITY
Despite all the pre-processing already done, it may happen that the background level is not very homogeneous within the image. Generally, this problem comes from parasite lights during exposures, reflection effects inside the telescope tube depending on its position, etc.
This is the case in our example, since there are a lot of light sources near the telescope. A method to solve this problem consists in realizing a mathematical, polynom-based map of the image background.
So, load the pre-processed result image (LOAD RESULT), and choose display levels so that the background is easily visible (use eventually a coloured palette to enhance this background). Then enter the following command (no parameters):
SUBSKY
If some bright or dark pixels are still in the image, they may be easily suppressed by the MAX or the MIN command. Suppose for example that there are 4 bright pixels in a given area of the image. Select the area with the mouse, then type:
MAX 4
The MIN command performs the same operation for dark pixels.
See also the commands: REPAIRX, REPAIRY.
To select the final rectangle in the image (the common area to the 6 images for example), select the rectangle with the mouse, then execute the Window command from the popup menu.
The coordinates may be also entered manually by using the command WINDOW2. For example:
WINDOW 2 6 373 248
Then, save the result. For example:
SAVE ARP97

10. A FULLY AUTOMATED PROCEDURE
Now than you know all about preprocessing deep-sky images, you will be interested in knowing also that there is a command that makes about all the processing described above:
FULL_PR [IN] [OUT] [DARK] [OFFSET] [FLAT] [NUMBER]
IN: generic name of the input sequence.
OUT: generic name of the output sequence (preproceded and registered images).
DARK: dark frame map.
OFFSET: offset (bias) frame map.
FLAT: flat-field frame map.
NUMBER: number of images.
For our example, select an isoled star on the first image (ARP97_1), then:
FULL_PR ARP97_ I DARK OFFSET FLAT 5
The final diplayed image is a simple addition of aligned elementary frame (equivalent to ADD2 command). It is perfectely possible to use another method for combining output sequence (ADD3, COMPOSIT,...).
FULL_PR is a simple, fast and efficient command !
The last figure of this tutorial show the importance of the choice of the combining technique on an enlarged portion of the final image (upper-left corner, command SCALE 1 4 4).
|
|
Left, a simple addition of the 5 images (ADD2 command). Right, use of the COMPOSIT command which illiminate bad pixels: The cosmic rays automaticaly disappeared for 1.7 sigma rejection (COMPOSIT J 1.7 1 0 5).