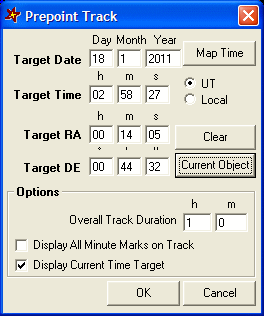
A pre-pointing line is displayed on the basis of the following fields:
- Target date and time: you must specify the date and time at which you want the specified object to be found in the centre of the field. If the UT option is checked, time as UT will be assumed. If the Local option is checked, local time will be assumed. The Map time button lets automatically fill these fields with the current map time.
- Right ascension and declination of the target: you must specify the equatorial coordinates of the object you wish to point at. If no coordinate is specified the pre-pointing line will not be displayed. The Current object button lets you automatically fill the fields with the last object identified by double clicking on the map.
- Duration of pre-pointing: these fields let you specify the length of the pre-pointing line back in time.
The option Display all minute marks on line lets you force the display of minutes on the pre-pointing line regardless of the zoom level. If this is not checked, C2A automatically determines the scale of minutes in relation to the zoom level.
The option Display target tat current time lets you display a target on the pre-pointing line that shows where we are at the current time of the map. This target facilitates the job of pointing the telescope during the preparation phase.
Time labels on the map are displayed in UT or local time, which depends on whether the option Display local time rather than UT is checked on the Date tab of the Options dialogue box.
