|
|
|
Composites by Examples Unsharp Masking (II) 2. The processing Now you learned how work theoretically the unsharp masking, let's using it. First step This is the main part of the processing but also the most heavy. It requests to create an unsharp mask by using a gaussian filter (low-pass) according a threshold to experiment. This averaging will remove the grain in the low light areas. For this step, most of advanced software provide a mask function which algorithm is subdivised in several logical tasks, some being other masks hidden in iconized functions for your convenience : - Display of an histogram or light curve of the raw image in order to manage easier the light distribution widespread in pixels - Select the area and the extend to correct on the image or its light curve - Define the weight of your mask - Apply a gaussian blur function.
At that point most software also provide an "Undo" function is case of your threshold or the attended effect is not satisfying. This is during this step that you can also handle many other filtering functions, subprocessing of the first. You can for example reduce stars appearance, sharpening their edges and rounding their aspect using specific algorithms, like the "feather" in Picture Windows Pro or Kazuyuki Tanaka's antiblooming routine. Depending on your objective and skills, this image will probably present no more contrasted details, no more high frequencies, but only a fuzzy "blop" poorly similar to your raw image. In other circumstances you will get a sharper image with a better contrast. Second step If you use the gaussian filter to create an unsharp mask you should now subtract (or Add negatively) this mask from your original raw image. The result is an image which only contains high frequencies but also noise generated by the subject itself when the exposure was taken. Third step Multiply logically this result up to 10 times, also to experiment. Not all programs provide this option which can be included by default in the threshold slider or similar tools.
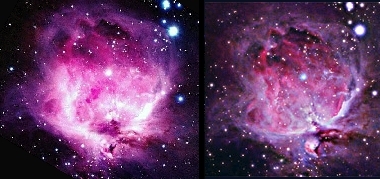
Fourth step For the last step you finally add the "multiplied" image to your original raw image. Here also, not all programs provide this option which can be included by default in the threshold slider or similar tools. Like by magic the new image will look like the original but all features will be enhanced, both in dim and bright areas. In fact all small scale details are now enhanced by a factor you defined two steps before. Unconvenients There are not numerous. The first one is the Gibbs effect or "black eyes" effect already introduced in the previous page. If you push the third step to far, enhancing too much a raw image presenting a low contrast, after processing artefacts may appear near area of highest contrast like stars, isolated satellites and in a lower proportion near the line of terminator, the limb of planets and Saturn's rings. The Gibbs effect appears mainly on deep-sky objects, subjects that exhibit by excellence low-contrast surfaces. As you can see it quite often, bright stars are circled with a black ring - hence the nickname "black eye" - and vice versa dimmer objects display a small bright ring. Such features look like a diffraction ring and are sometimes linked to the subject itself but most of them are artefacts that you must absolutely avoid to create. A similar unconvenient occurs when using the Maximal Entropy, Lucy-Richardson or VanCittert function. This effect cannot be suppressed excepting by reducing your filtering intensity. The second effect is directly linked to the high-pass filter : the noise amplification. Trying to improve your small scales details using an unsharp mask, you amplify in the same time the noise hidden in these high frequencies. The issue finds its explanation in the quantum nature of light and signal-to-noise ratio of your raw image. As the noise is proportional to the square root of the signal (for example S/N=100, N=10), once amplified by your intermediate steps, the signal-to-noise is reduced drastically (S/N=10) but the noise itself reached a threshold where it is sometimes superior to features you have tried to preserve. At that point your small features are on par with the noise.
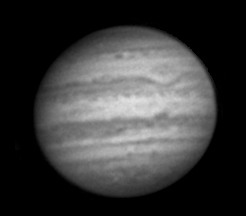
To solve these two problems there is no compromise : you have to get good raw images or to program an algorithm to reduce those spike noises. To solve this last problem, programs are available to Meade (not perfect) and to some amateurs. Solving the first problem and get good raw images means using a sturdy equatorial mount, a scope collimated with accuracy, stabilized in temperature, performing an excellent focusing and to picture when the seeing is at its best; nothing less, but this is the price to pay for the high resolution as Jean Dragesco explained us in another page written in French. Next chapter |
||||||||||||||||||||||||||||
|
|
|||||||||||||||||||||||||||||