THE TOOLS
Some tools indispensable to wire the Audine camera. The picture below shows
what is necessary:
- Pincers to denude the wires. They will be used during the making of the
camera power-supply wire.
- Flat tongs with thin extremities. It's an indispensable tool to fold to
90° the legs of the discrete components before soldering them onto the card.
- Wire cutters.small ones will perfectly work.
- A good quality soldering iron. The one on the picture is quite sophisticated
as it allows the precise setting of the pane. A soldering iron with fixed
temperature can of course be used (the good soldering temperature is around
350°C). The pane of the iron must have a thin extremity, it is important to
achieve precise solders. Notice the presence of a sponge that must be humidified
to clean the pane from time to time and get rid of the soldering excesses.
- Soldering material. It is wished for using fine soldering ( 0,5mm gauge,
reference 206-0048 in the RADIOSPARES catalogue). Soldering with a bigger
diameter will be practical to wire the DB25 and DB15 connectors only (0,7mm
gauge, reference 206-0054 by RADIOSPARES). A good quality soldering must be
chosen, letting no trace, of the type Sn63Pb37.
- Unsoldering braid. It's made of copper wires that absorb the soldering
when it is heated. This accessory is important if you make a mistake during
the wiring, because it allows to remove the component that was bad positionned
during a lack of attention. Choose a braid of soldering quality (reference
221-4914 in the RADIOSPARES catalogue).
- Adhesive tape to fix the components on the card before soldering.

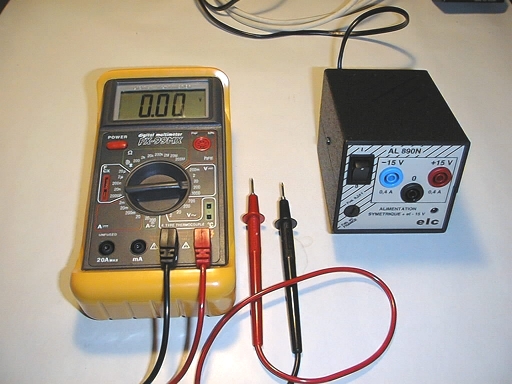
You must get a digital voltmeter equipped with touch points. With about 250FF
you can find multimeters allowing to measure tensions, but resistances and capacities
too
Indispensable. You need a little stabilized power-supply allowing to deliver
+/-15V under at least 100mA. This latter can be easily fabricated with a small
transformer, some capacitors, diodes and integrated regulators like the 7815 and
7915. But it's not sure that this process pays indeed, bacause such a power-supply
can be found already done , for sale, for less than 300FF. The model shown on
the picture below has the reference AL890N by ELC. It is available at many elecronic
material secondhand dealers'. Compact, easy, efficient and cheap, this power-supply
will be your ideal companion. Of course you can use a more sophisticated model,
allowing for example to measure the current output, which is practical to spot
anormal consumptions of the electronics.
 Among the other practical accessories, we must point out the solderer vice that
will facilitate the processes like the wiring of the connectors.
Among the other practical accessories, we must point out the solderer vice that
will facilitate the processes like the wiring of the connectors.

Still in the accessories chapter, you must dispose of a watchmaker srewdriver
to adjust the value of the multitour potentiometers and a bigger screwdriver
to make lever in order to take the integrated circuits away from their holder.
A magnifying glass can be useful to check the solders or read some of the indications
on the small electronic components.
A good lighting is very important to avoid tiring one's eyes and doing nonsense.
Think too that you will probably build Audine in the evening.
 It must be pointed out that an oscilloscope is absolutely not indispensable
to build Audine. Fortunately,because it would be by far the most expensive tool
(several thousands francs). The whole procedure to test Audine is based on the
use of a digital multimeter. However, for those who already possess an oscilloscope,
you will find in this assembly account some indications
on the look of the signals you can visualize with it. But, let's repeat it,
your Audine camera can be assembled without the help of an oscilloscope if you
follow scrupulously the indications of this notice.
It must be pointed out that an oscilloscope is absolutely not indispensable
to build Audine. Fortunately,because it would be by far the most expensive tool
(several thousands francs). The whole procedure to test Audine is based on the
use of a digital multimeter. However, for those who already possess an oscilloscope,
you will find in this assembly account some indications
on the look of the signals you can visualize with it. But, let's repeat it,
your Audine camera can be assembled without the help of an oscilloscope if you
follow scrupulously the indications of this notice.
Of course a computer is indispensable for the assembly and the use of Audine.
A portable one will surely be attractive, because light and compact. You will
probably be able to lay it on your desk. A PC of type Pentium, even with low
clock speed, is perfectly suitable to guide Audine. You must however, on this
PC, dispose of at least 50Mo free harddisk space to install softwares and record
your first images. Windows95/98 must be installed on the computer.
