|
Don't
be afraid of CCD
|

|
|
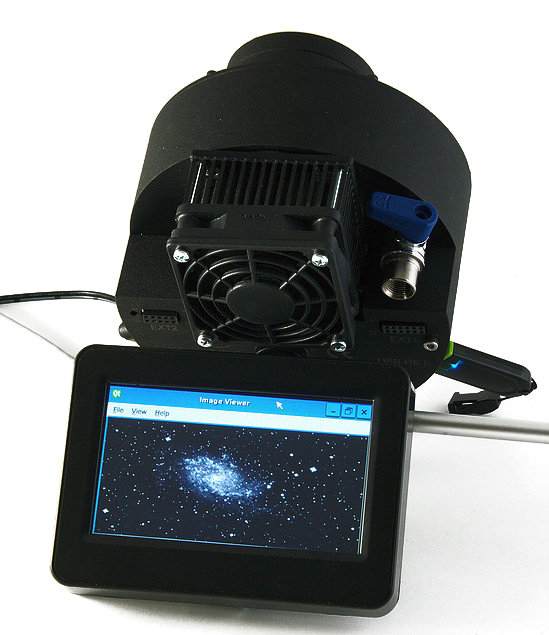
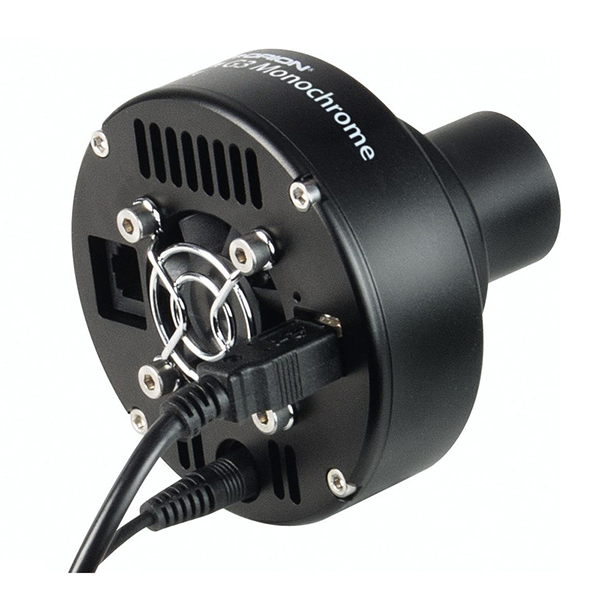
Astrel
Instruments AST-DU-4.3-A color CCD with a 4.3" touch screen
and Wi-Fi (100 €). |
Guiding systems (III)
When
speaking of astrophotography, there are two kinds of applications : planetary
imaging and deep sky imaging. If the first can easily manage snapshots
on relatively light installations, the second requires long
integration (exposure) times and thus a sturdy and accurate mount.
Explanations.
The size of a CCD pixel
being very small, some 10 microns, and the complete chip up to 10 times smaller
than the 35 mm format, this simple relation explains that a CCD camera are
easily capable of showing very small guiding errors with fiendish
accuracy. Therefore a sturdy equatorial mount and an accurate
focusing system are required to get good pictures, specially for deep sky
imaging. We will come back on the mount later.
In
these conditions, the amateur must be assisted with an accurate guiding
system. Guiders are available in various forms and configurations, from
the simple piggyback guide scope to the autoguider equipped with a
dedicated CCD.
The
main disadvantage of small CCDs like webcam-based guiders is their low sensitivity
and their capability at guiding on anything but bright stars. Choosing the
right combination Scope-CCD can thus make the difference between succeed and
fail in picturing faint or deep sky objects.
Many accessories can ensure this
task that we can gather in the three following categories :
1.
The guide scope in piggypack on the main scope
2.
The off-axis guider with or without computer
3.
The combined (auto)guider and imager CCD.
Let's
review each of these solutions.
1.
The guide scope
The
first solution is the guide scope (in the general sense as it can be a
reflector) in piggypack on the main instrument, and equipped with a CCD
camera connected to a computer, itself linked to the scope mount as we see below.
The
advantages of this set up are as numerous as its disadvantages. Indeed,
among its advantages, the piggyback (attachment in parallel)
solution requires only one mount and is more flexible than the other solutions
in that sense that the user can point the guide scope independently from the
main scope to any target, even off the main scope axis. In addition, the two
scopes being physically separated, the light beam of the guide scope does
not affect the one of the main scope. So the user can use the guide scope
without filter or flip-mirror and can thus acquire a guide star up to 30 %
dimmer than through a filter, a serious advantage knowing the difficulty
of this task through a filter that usually restricts its use to the brightest
stars.
But
there are also drawbacks in using a piggyback guide scope. Such a set up works
very well when instruments are fixed for good or the installation rigid. In the
other cases, forget it. Why ? Because its first disadvantage is the total
charge of both scopes and their accessories that can be at the limit of the mount
specifications without to mention the possible torque issue on small
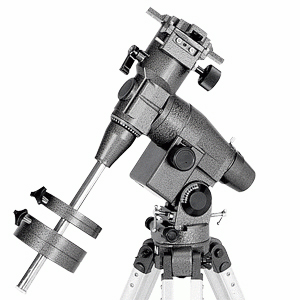
mounts. A small mount like Vixen Super Polaris
EQ-4 supports a load of 4 kg maximum and it is thus practically not
possible to piggyback it a classic guide scope (the OTA weight of the Sky-Watcher
70 mm f/7.1 refractor is 4 kg). In all cases, the EQ-4 mount is not designed
to be computer-assisted (it can just receive a motor drive and a hand controller for manual corrections).
If
you can use a light mount for the visual observation of the sky, in astrophotography
there is no compromise. Better to keep a margin of safety by oversizing the mount
rather than using an undersized system. The safety margin is very important and
must be of several kilos on small mounts, otherwise the use of a guiding scope,
a CCD camera or a heavy optical train is practically impossible. The only downside
of an oversized mount is it weight.
As
an example, let's take the very popular small Takahashi FSQ-85
refractor
which OTA weighs 4 kg or the FSQ-106ED weighing 7 kg.
More than one amateur add it a 60 to 80 mm guiding scope weighing 1.4 to 2 kg and a CCD camera that can
weigh up to 3 kg. The set therefore weighs less than 12 kg. In this configuration, the ideal
is to use a Takahashi EM200 Temma 2M mount of 15 kg (excluding counterweight) which supports
a 15 kg load (optimal), a Skywatcher NEQ6 mount of 16 kg which supports a 20 kg load, a Losmandy G11G
Gemini 2 mount of 16 kg which supports a 27 kg load or even an Astro-Physics AP900 mount
of 25 kg which supports a 32 kg load. In a fixed observatory and using a pillar, an advanced
amateur can afford to use an even more massive mount, but the price quickly becomes prohibitive.
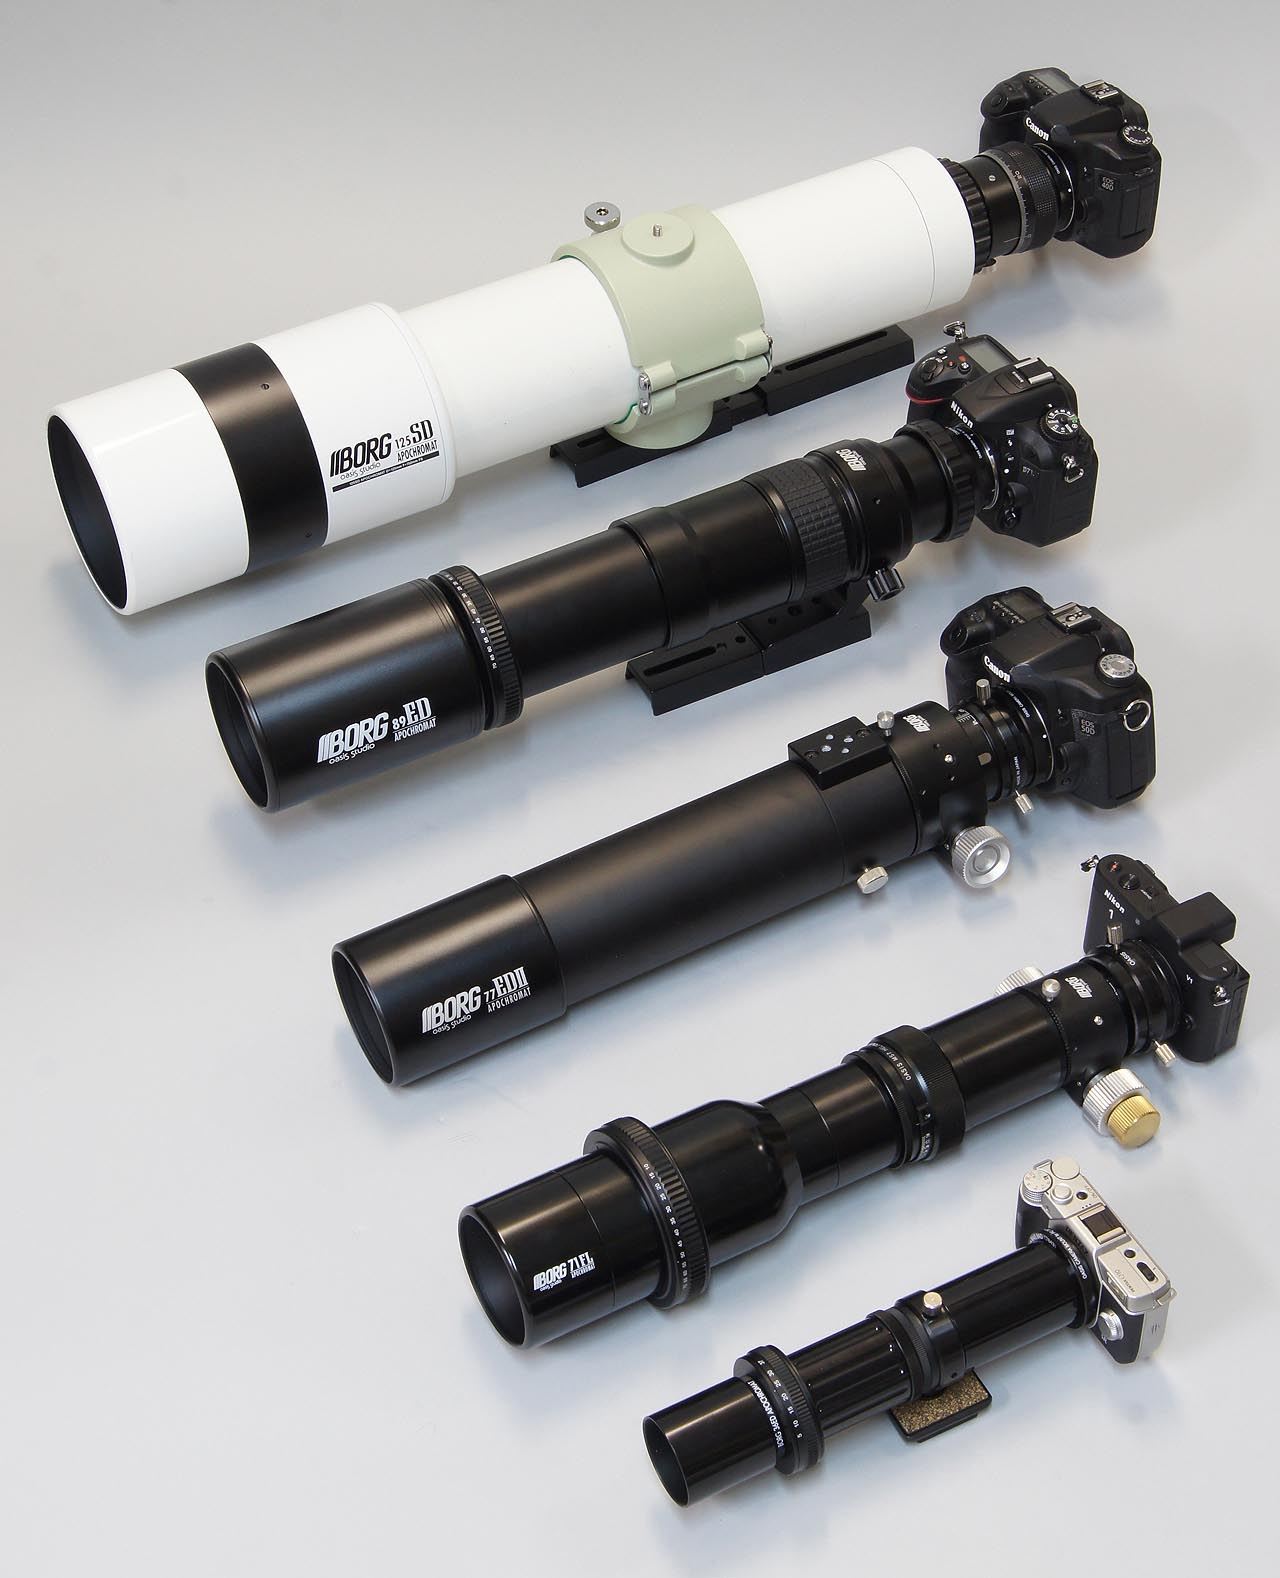
To
avoid too massive portable installations, some manufacturers provide small
guide scopes weighting between 300-500 g among which the SBIG
kit including a 100 mm f/2.8 lens designed for the ST-i autoguider, the small
Borg
FL refractor at two fluorite elements fluorite from 35 to 90 mm in diamètre f/4.5
to f/7 weighting between 175 g and 2 kg depending on models (or the
apochromatic BORG
Oasis Studio models from 50 to 125 mm in diameter often used with
DSLRs) or even the small short Orion
refractor of 50 mm f/3.2 (Guide Scope Mini 50) and 60 mm f/4 (Multi-Use Guide
Scope) accepting for example the Orion StarShoot series of CCD autoguiders
combining a guider and an imager at rates up to 200 fps.
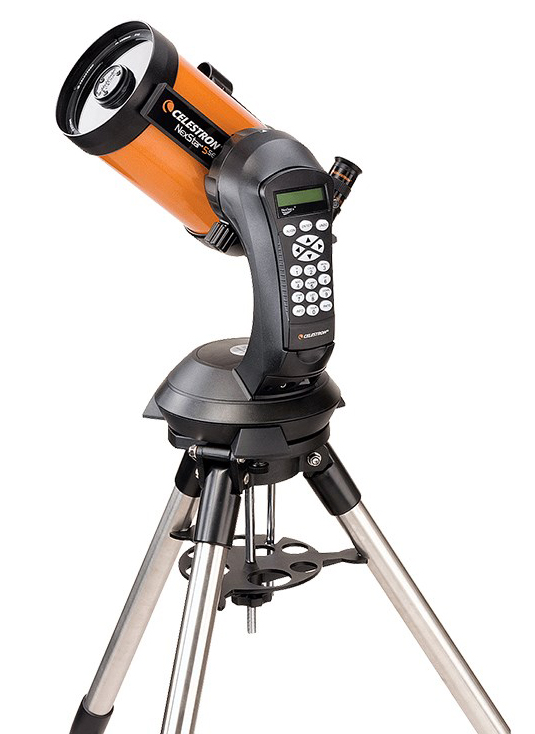
As for small catadioptric GoTo
telescopes, Celestron NexStar for example as NexStar 5SE
of 125 mm in diameter can use the NexGuide
autoguide CCD camera that also takes into account the effect of backlash
(the play on the declination axis) during autoguiding. Ideally, the best
to do is to attach in piggyback one of the small guide scopes described
above weighing less than 500 g (~ 55 mm in diameter) equipped with a small
autoguide CCD camera. However, the mount being not very robust, its
performances in deep-sky imaging are limited.
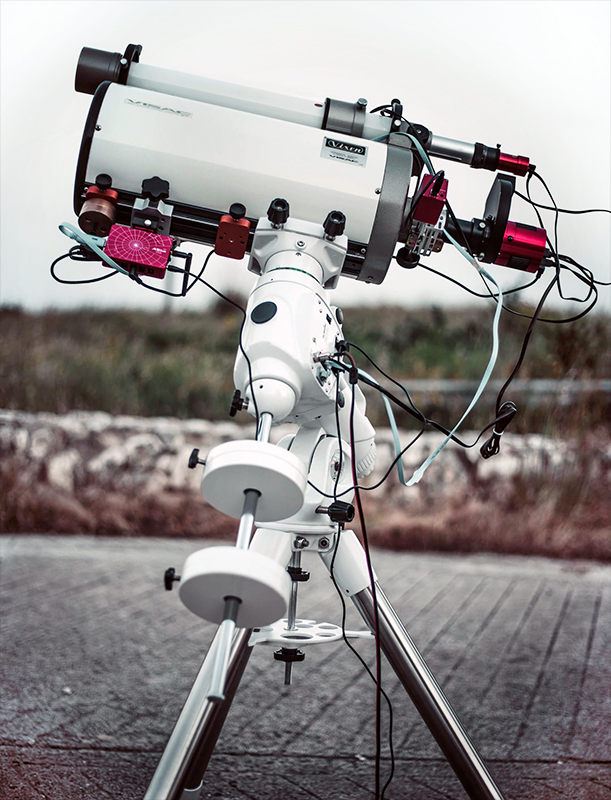
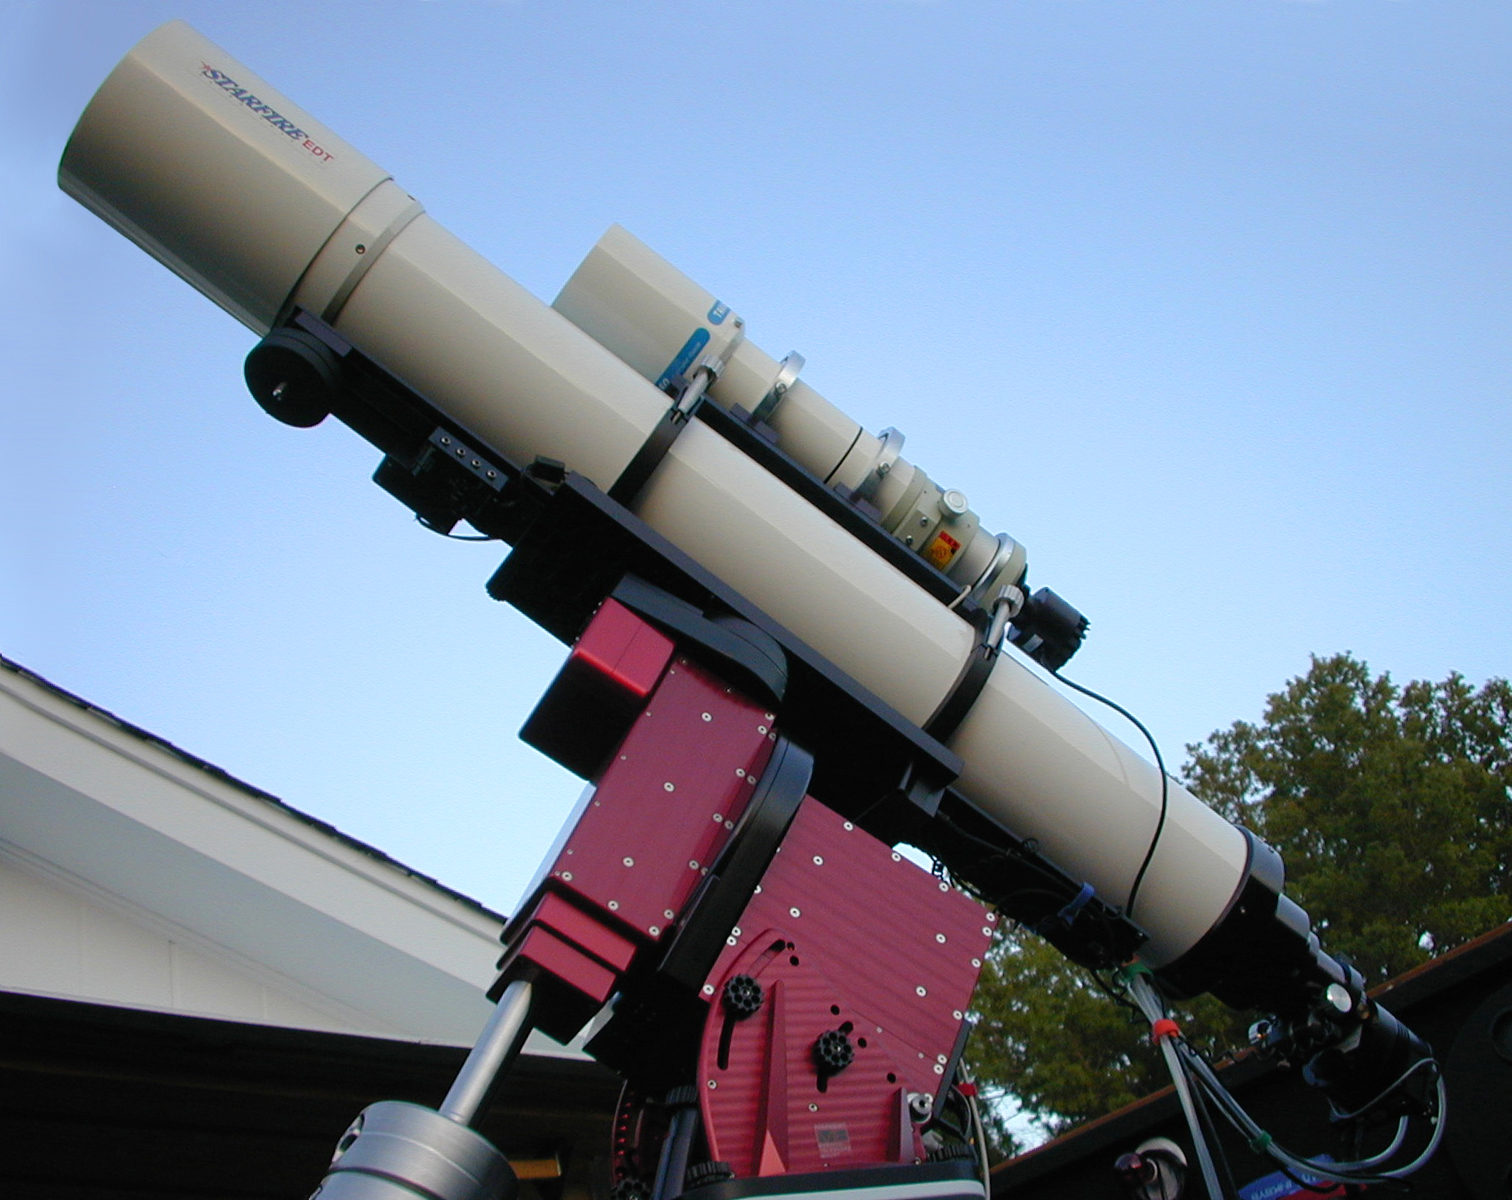
By
contrast, when we want to take advantage of a large guide scope
(from 100 mm in diameter showing e.g. a weight of 3 kg for the Takahashi
FC-100 DF f/7.4 APO) either for guiding or imaging, it is recommended to
use it only in conjunction with sturdy german mounts able to support heavy
loads, and including of course an electronic module for autoguiding at
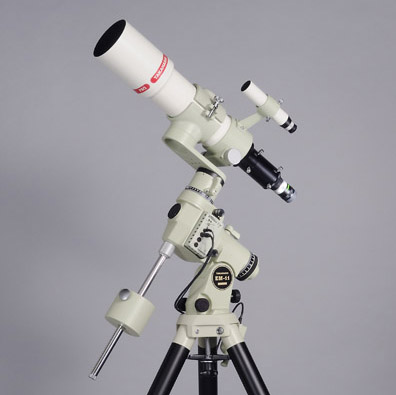
least compatible with SBIG ST-4. Among these models name Sky-Watcher
EQ-5 Pro with the ST-4 USB kit (load capacity of 10 kg counterweights excluded), Takahashi EM200 Temma 2M
(18 kg), Losmandy G11 (27 kg), Sky-Watcher EQ8 GOTO
(50 kg), Astro-Physics 1200GTO (63 kg)
and other Software Bisque Paramount ME II
(109 kg). Depending on models, these mounts must be able to support for example two
instruments of 150 mm in diameter (2 OTA of 7 kg each) or of 180 mm in diameter
(2 OTA of 15 kg each) and their accessories (up to several kilos). We can also
use the sturdiest altazimutal forks (not those using a single
fork arm) supporting catadioptrics.
The use of a guide scope can
also have an impact on the tracking system, what we
call the differential flexure. This potential problem is more apparent at high
magnification and it is not directly linked to the weight of the guide
scope. During the guiding, the guide scope can slightly move in its mounting rings.
Very small moves (we speak of a scale from some hundreds of microns to some millimeters)
will be interpreted by the guide CCD as a shift from the nominal position, and thus
the system will try to compensate for a guiding error that in fact does not exist.
 |
 |
|
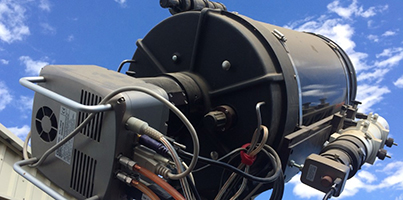
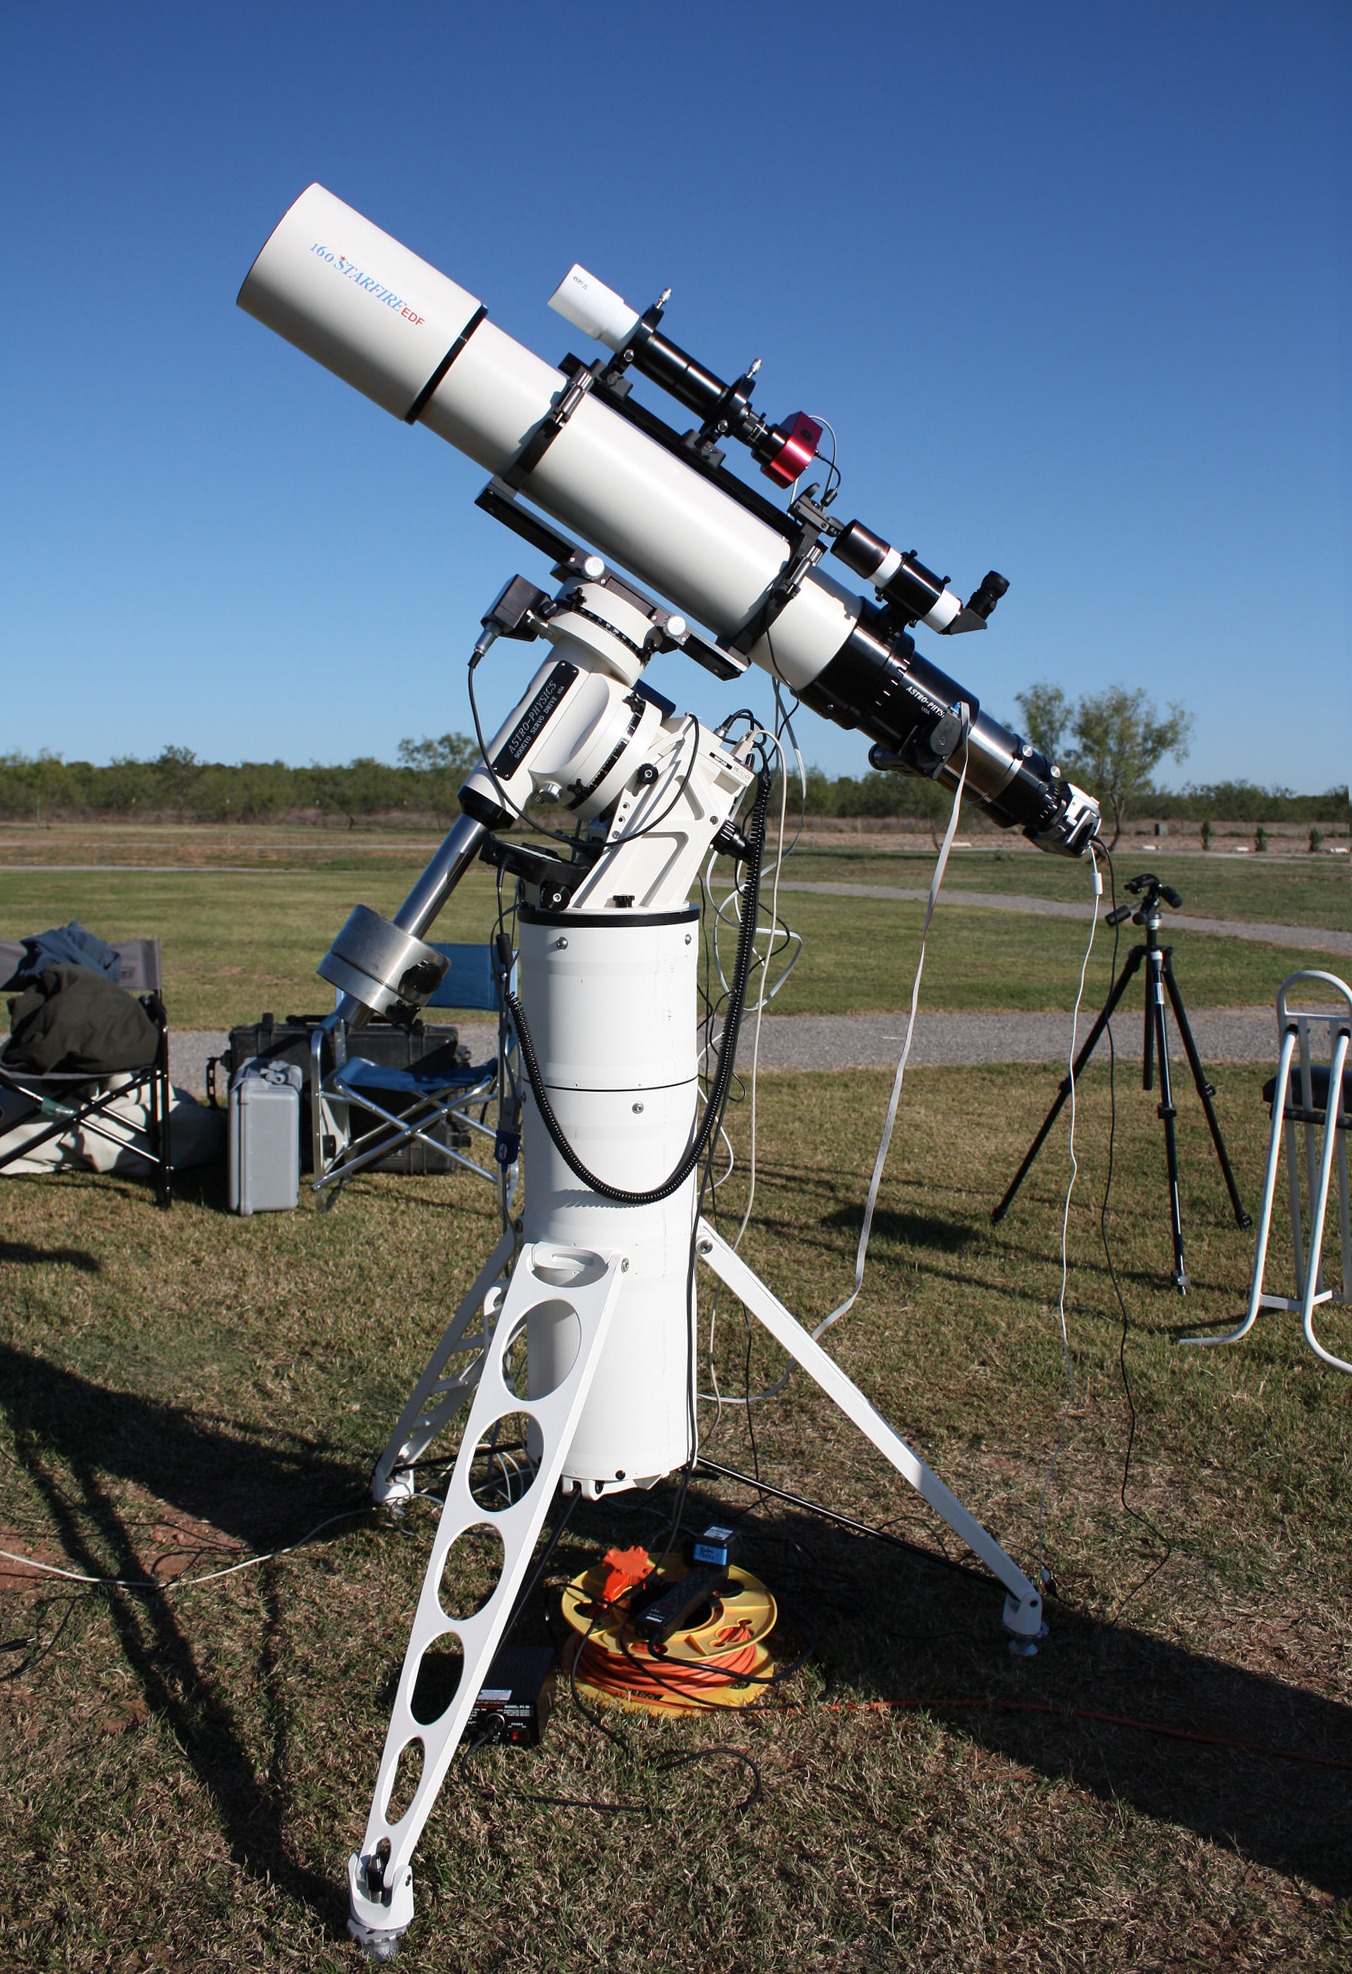
Two
high-end installations used under the dark skies of south
Arizona. At left, a C14 equipped with a SBIG-1301E CCD with a
piggyback Borg 76 f/6.6 ED refractor. At right, an Astro-Physics 180 mm
f/9 EDT refractor fixed on a Software Bisque Paramount
GT-1100ME mount and connected to a SBIG ST-10XME water-cooled
CCD with for guide scope a Takahashi FSQ-106N f/5 quadruplet
fluorite refractor equipped with a SBIG ST-237A CCD. Documents Huachuca
Astronomy Club and Frank
Barnes. |
|
At
last, consequence of this setup, the amateur needs to purchase a second scope in that purpose. If a
small 100 mm telelens is enough for wide-field pictures (e.g. in
conjunction with a SBIG ST-i or Lodestar autoguider, see below), to track with
accuracy small deep sky objects with a dim star requires a larger guide
scope, usually from 80 to 120 mm in diameter and from 480 to 1000 mm of focal length.
Note that in
all cases, this solution requires an external control, usually via a portable
computer linked by cables to the CCD and to the mount.
Although performing,
this solution can be expensive. It also becomes outmoded or obsolete because
of the invention of the off-axis guider and till more with CCD
cameras combining the guider and the imager.
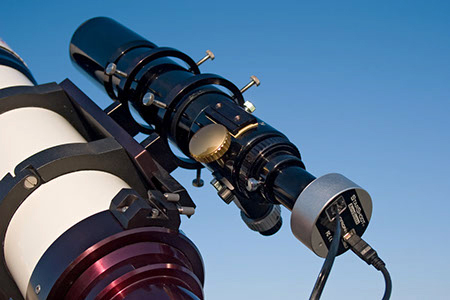
2.
The off-axis guider with or without computer
As
all amateurs cannot afford several scopes, as in the old good time, another solution is to not use
a guiding-scope but to attach the guiding CCD on an off-axis guider, aka
OAG, as we see below that will drive alone the motors of the mount while
the amateur will record his pictures with the main camera.
In this case, the amateur also needs of an external computer to control
the system.
More
recently, some manufacturers have imagined a solution that eliminates the
need of computer : it is the autoguider CCD (e.g. SBIG SG-4, Celestron
NexGuide, Orion StarShoot, Starlight Xpress, Lodestar, etc.) that performs the guiding functions
standalone, without external computer. Of course, the system is fed and
connected to the telescope motorized mount.
But
how to assembly all these parts together ? The simplest solution is to use an
off-axis guider as we see below at center. The alternative is using a second
small scope in piggyback to the main one as we see below at right with
constraints described above.
To
watch : On-Axis Guiding for Astrophotography
 |
 |
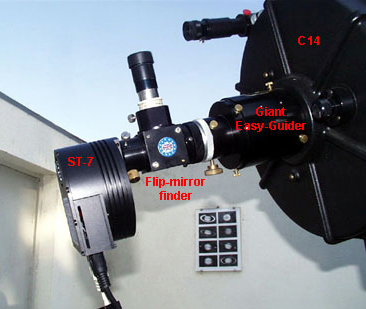
Pedro
Ré's SBIG ST-7 CCD
with a True Technology flip-mirror
(2650$+175$). |
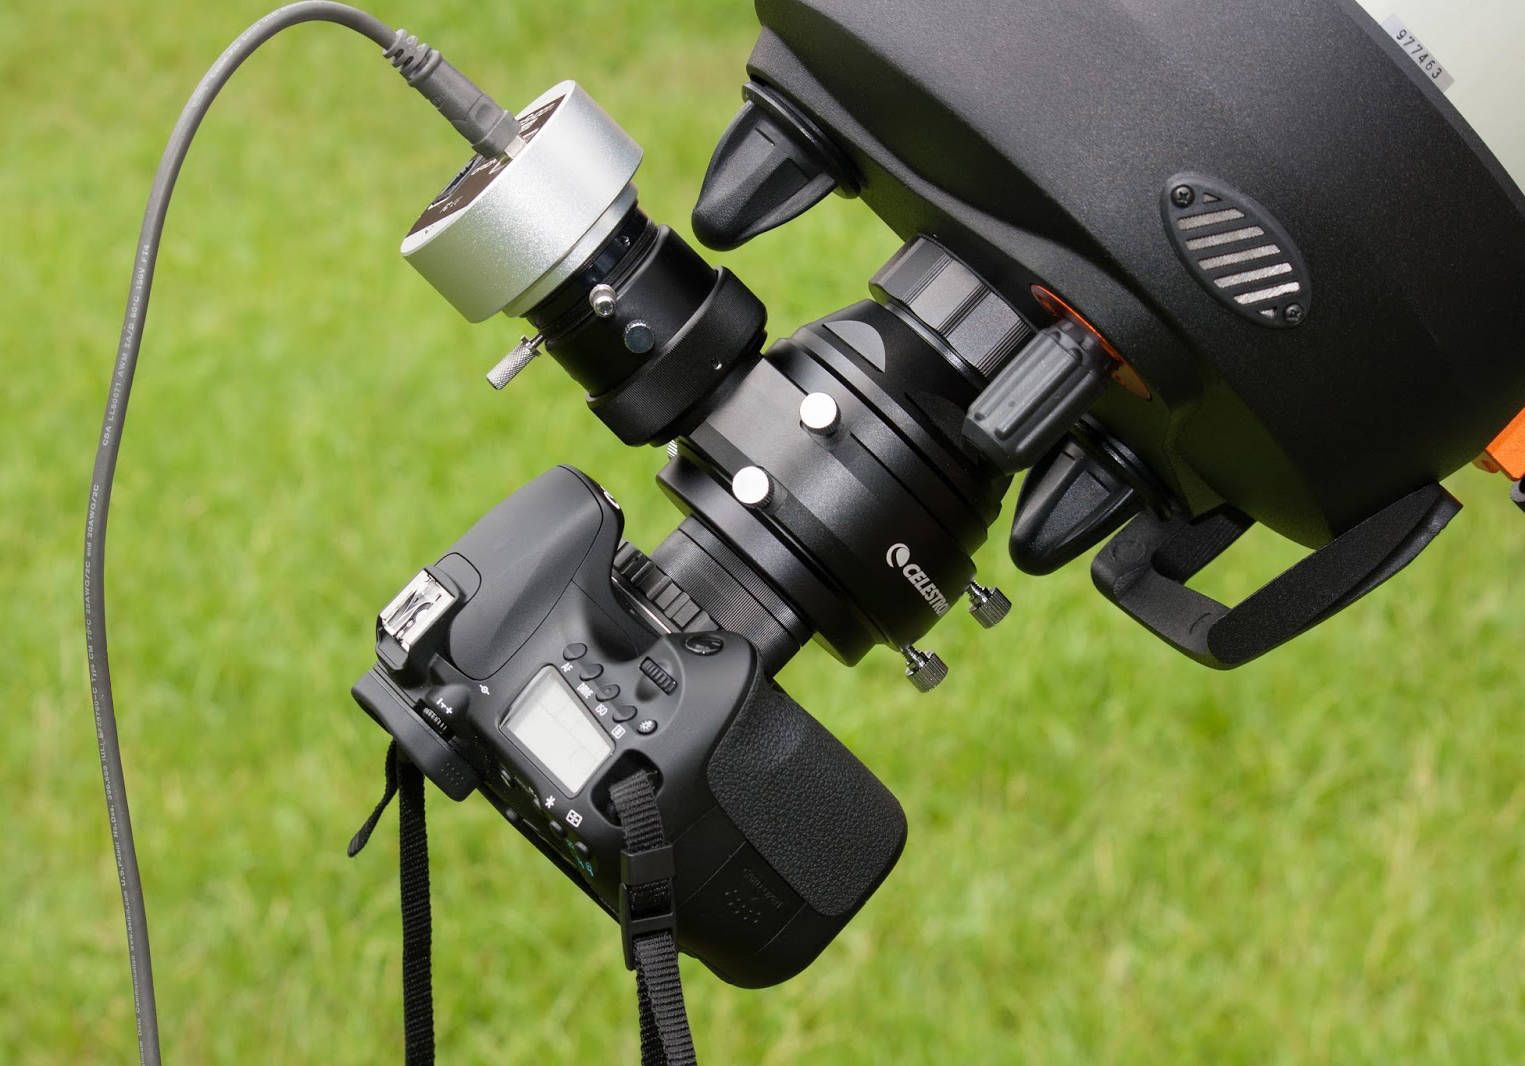
Celestron
C8 CPC equipped with an Orion
StarShoot Autoguider and DSLR
(280 € + off-axis
adapter). |
|
The
most elegant and practical solution is to insert a small mirror or a flip-mirror
on-axis between the OTA and the CCD camera. If in the past this accessory
was cumbersome and is till sometimes, today there are narrow models. Among
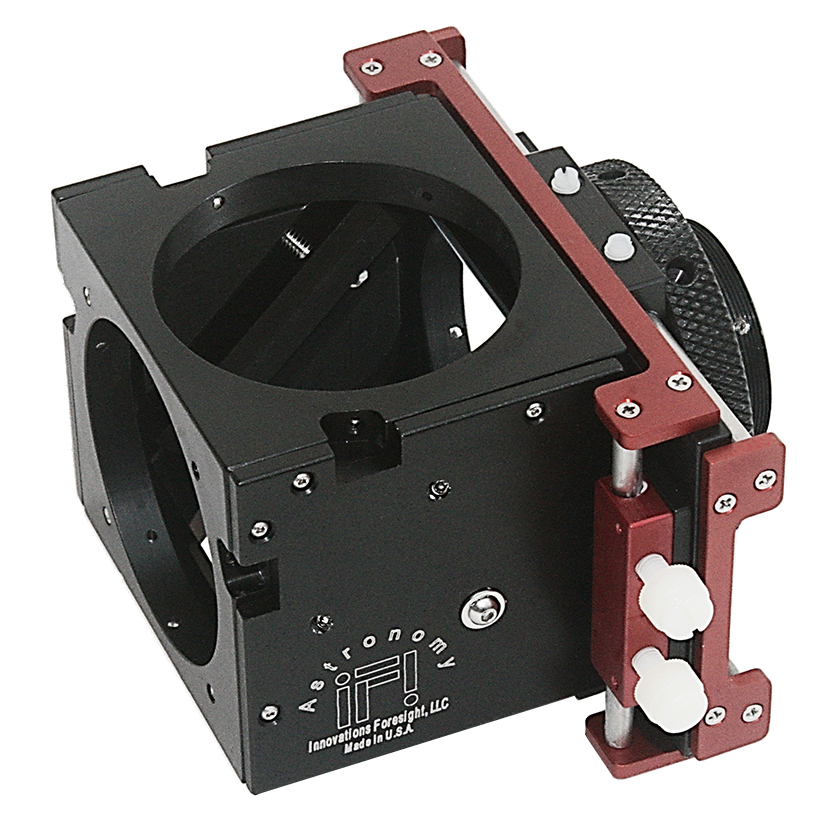
these OAG name the SBIG OAG-8300,
Innovations
Foresight ONAG-XT guider, Lumicon Giant
Easy-Guider, Celestron OAG, Meade
OAG, Orion thin off-axis guider as
well as older models like the True Technology
OAG among others.
These
units have 2 outputs and allow to use either a powerful illuminated reticle eyepiece
at 90° or a CCD guider camera at the same time as the main camera or the DSLR in
order to ensure tracking corrections. Below is an example of on-axis full-frame
guiding system of last generation adapted to Schmidt-Cassegrain telescopes. At right,
the minimalist "thin and slim" version from Orion.
To
read : ZWO Off-Axis Guider for Astrophotography,
ZWO
The
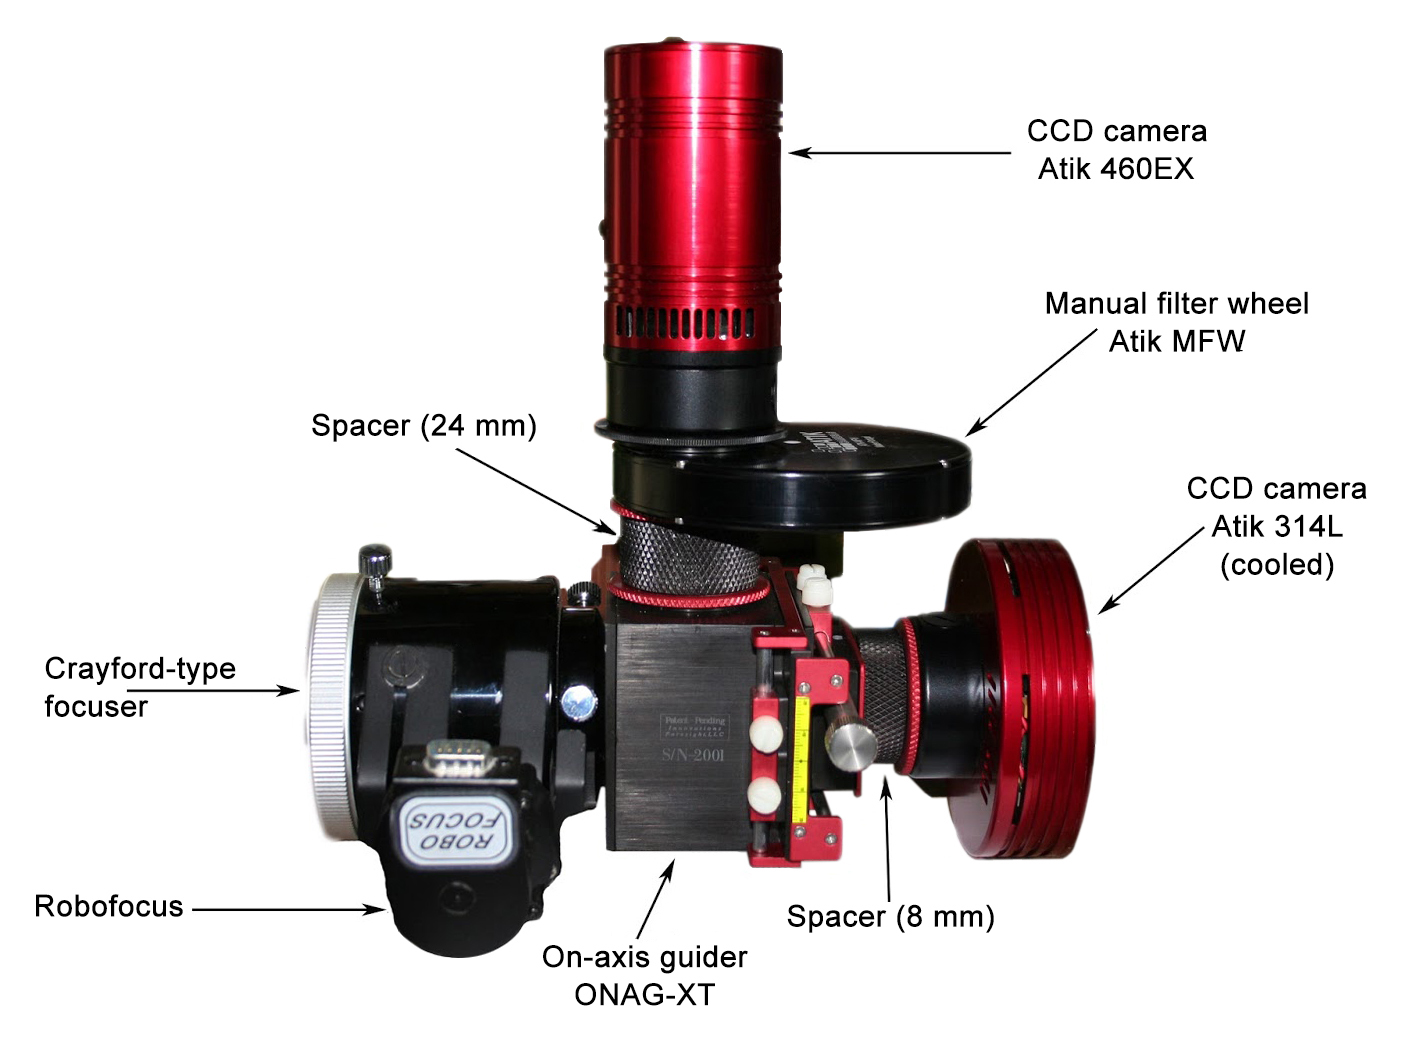
ONAG from Innovations Foresight
(PDF), Dennis di Cicco, S&T, 2015
With
time, manufacturers have developped new more compact solutions combining
in the same box the guide CCD and the imager CCD camera, eliminating the need for the off-axis guider.
3.
The combined (auto)guider and imager CCD
Among the first
CCD cameras combining a guider and an imager, the Astrovid Star 2000
system (e.g. MX5 or MX9 camera) used a special device splitting each pixel in two
independently readable halves, one integrating long exposures while the other
selects a star in the field up to magnitude 11 for guiding the telescope.
Thanks
to a further miniaturization, these last years some manufacturers have developped a
till more ingenious solution combining this time a dual-chip including the autoguider
and the imager. As we seen below, modern autoguiders/imager are available in various
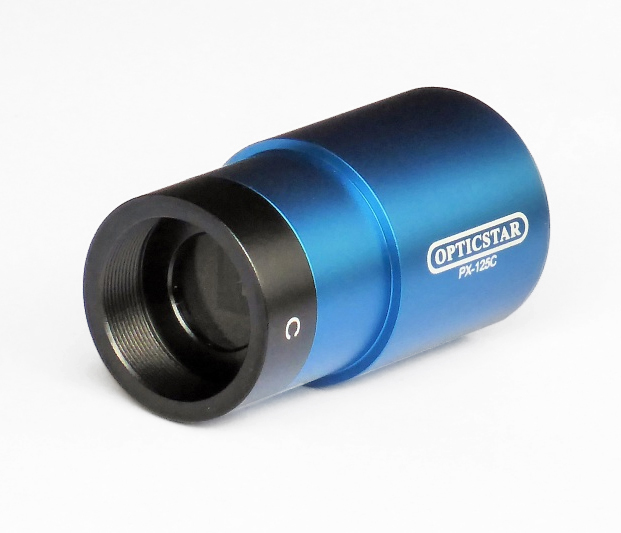
forms and price range (e.g. Orion StarShoot G3, Opticstar PX-125C, SBIG ST-7EA, STL and STT series, etc.).
Other
manufacturers have designed a CCD camera including a small diagonal mirror that
redirects a part of the light beam to an external guider (e.g. SBIG
STF-8300 with FW5 and OAG, Quantum Scientific Imaging QSI 540wsg or QSI 683wsg-8, etc.).
Remains
one issue, the guide star acquisition through possible filters that we
evoked earlier which is the main weakness of most (auto)guiding systems.
To resolve this issue, some manufacturers like SBIG have placed the guide CCD
sensor within the filter wheel instead of behind the filters. With such
a device at your disposal, you have no more excuses to select a faint guide star.
To
read : SBIG's
New STT-8300 Camera
(PDF), Dennis di Cicco, S&T, 2013
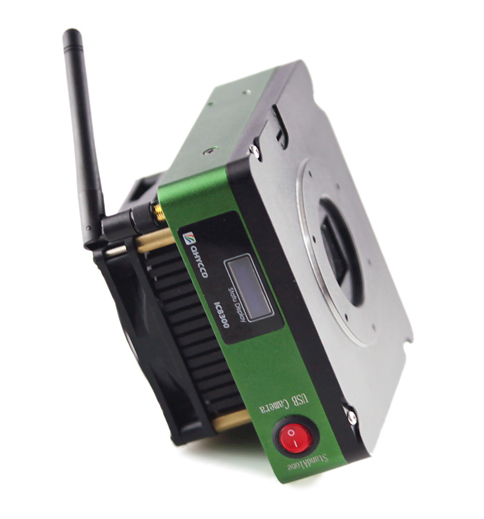
QHY
IC8300 CCD (dual chip and WiFi connexion)
Drawback of this integrated solution,
if an entry-level model is relatively light (~350 g) and cheap (< 500 € or
400$), with a filter wheel and a regulated cooling system a complete high-definition
dual-chip CCD is of course more cumbersome than a low form factor CCD, heavier
(~2.4 kg for SBIG STT-8300 with its filter wheel) and rather expensive (~4550 €
or 3800$ for SBIG STT-8300 in 2016 but there are also models exceeding 32000$). These
dual-chip models represent today the most performing solution offered to amateurs for deep-sky imaging.
Of
course, none of these solutions eliminate the computer that is always
mandatory for the inital setup (selection and lock on the target,
focusing, etc.) and to download each image or video recorded by the CCD camera (main or combined).
Looking
ahead, some manufacturers already offer Wi-Fi CCD cameras (the color model AST-DU-4.3-A
from Astrel Instruments with a 4.3" touch screen at 100 € in 2016, QHY IC8300 at 2200$
in 2015, etc.). We can also imagine that they will be equipped with a flash storage memory (SD card)
which will prevent losing time after each shot to download the image.
Next chapter
Integration
time
|


